
Quail eggs take 18 days to hatch, so you'll need to maintain a temperature of 99.5°F and keep humidity at 40-50% for the first 15 days. Be sure to turn the eggs 3-5 times daily to prevent the embryos from sticking. During the last few days, increase humidity to 70-80% and avoid opening the incubator. After hatching, leave the chicks in the incubator for 12-24 hours to dry off, then move them to a brooder set at 95°F. With the right care, your chicks will thrive, and you'll find even more tips ahead.
Key Takeaways
- Quail eggs incubate for 18 days at a stable temperature of 99.5°F and specific humidity levels for successful hatching.
- Maintain humidity at 40-50% for the first 15 days, increasing to 70-80% during lockdown to ensure proper embryo development.
- Turn eggs 3-5 times daily for the first two weeks to prevent embryos from sticking to the shell.
- After hatching, keep chicks in the incubator for 12-24 hours to dry before transferring them to a brooder.
- Feed newly hatched chicks a high-protein diet (27%) with gamebird starter crumbles and ensure clean water access.
Top picks for "quail eggs hatch"
Open Amazon search results for this keyword.
As an affiliate, we earn on qualifying purchases.
Overview of Quail Hatching

Hatching quail eggs is an exciting process that requires careful attention to detail.
You'll typically spend about 18 days in incubation before those adorable Coturnix chicks make their appearance. Maintaining the right temperature at around 99.5°F is essential, along with humidity levels of 40-50% for the first 15 days, increasing to 70-80% during lockdown.
Don't forget to turn your eggs 3-5 times daily for the first two weeks to keep the embryos from sticking to the shell. Allow shipped eggs to rest for 24 hours before starting, and remember that your initial hatch rate will be about 50%.
With proper care, you'll likely improve this over time, so start with at least a dozen eggs to account for potential losses.
Selecting the Right Quail Breed

When selecting the right quail breed, consider starting with the Coturnix Quail, especially if you're a beginner.
These birds are hardy and can lay about 300 eggs a year, giving you a great return on your investment early on.
Plus, with a quick incubation period of just 18 days, you'll see results faster than with many other poultry options.
Ideal Beginner Options
If you're new to quail breeding, the Coturnix Quail is an excellent choice for your first flock.
These birds are hardy and produce around 300 eggs per year, making them ideal beginner options. Coturnix quail eggs hatch in just 18 days, so you won't have to wait long to see baby quail.
To guarantee successful hatching, focus on maintaining the right temperature and humidity levels during the hatching process. When you incubate and hatch, it's wise to order twice the number of eggs you want chicks, given the average hatch rates.
Remember to turn the eggs regularly! For feeding, opt for a Game Bird Starter to support your growing chicks. Additionally, providing early socialization opportunities for your chicks can help them grow into well-adjusted adults.
Happy breeding!
Egg Production Rates
Choosing the right quail breed can greatly impact your egg production rates. The Coturnix Quail is an excellent choice for beginners, as they provide a reliable source of quail eggs, laying around 300 eggs per year per hen.
They typically start laying eggs at just 8 weeks old, ensuring a quick return on your investment. Their hatch rates are impressive, with eggs hatching in only 18 days, which is faster than many other poultry.
To optimize production, maintain a male-to-female ratio of 1 male for every 4-6 females in your flock. This balance promotes prolific laying and improves fertilization rates during the incubation process, making your first hatch a successful venture in hatching quail eggs.
Incubator Setup and Maintenance

How can you guarantee your incubator is ready for quail eggs? Start by preheating your incubator for at least 24 hours to verify a stable temperature of 99.5°F for forced air models or 101-103°F for still air. Maintain humidity levels at 40-50% until day 14, then increase to 65-70% for lockdown. Equip your incubator with an automatic egg turner, turning eggs 3-5 times daily until day 15, when egg turning should stop. Conduct a final candling around day 14 to check for non-viable eggs, and remember to avoid opening the incubator during hatching.
| Day | Temperature (°F) | Humidity (%) |
|---|---|---|
| 1-14 | 99.5 / 101-103 | 40-50 |
| 15 | 99.5 / 101-103 | 65-70 |
| 16+ | 99.5 / 101-103 | 65-70 |
| Lockdown | 99.5 / 101-103 | 65-70 |
Monitoring Temperature and Humidity

To successfully hatch quail eggs, you need to keep a close eye on both temperature and humidity.
Aim for a steady 99.5°F and adjust humidity levels between 40-50% for the first 14 days, then ramp it up to 65-70% during lockdown.
Regular monitoring and adjustments are key to ensuring healthy embryo development and a high hatch rate.
Ideal Temperature Settings
Maintaining the right temperature and humidity levels is essential for successful quail egg incubation. The ideal incubation temperature for quail eggs is about 99.5°F (37.5°C), with a slight preference for 99.7°F for best conditions.
During the first 14 days, you should keep humidity levels between 40-50%, and then increase it to 65-70% as the eggs approach hatching. If you're using forced air incubators, aim for a humidity range of 50-60%, while still air incubators should be set to 35-40% initially.
Regularly monitor temperature and humidity with a digital thermometer and hygrometer, as fluctuations can harm embryo development. Avoid opening the incubator during the lockdown phase to preserve necessary humidity for successful hatching.
Humidity Adjustment Techniques
Proper humidity adjustment techniques are essential for successful quail egg incubation. To achieve ideal humidity levels, follow these steps:
- Maintain humidity around 40-50% during the first 15 days. Adjust by adding more water as needed to prevent a humidity drop.
- On day 16, increase humidity levels to 70-80% to prepare for lockdown and hatching. Stability is key during this phase.
- Use a hygrometer to monitor humidity accurately. If you notice a humidity drop, consider using a damp sponge or humidifier to maintain humidity.
Regularly check and adjust water levels in the incubator to guarantee the desired humidity remains stable.
Avoid opening the incubator during lockdown to promote successful hatching.
Understanding the Lockdown Process

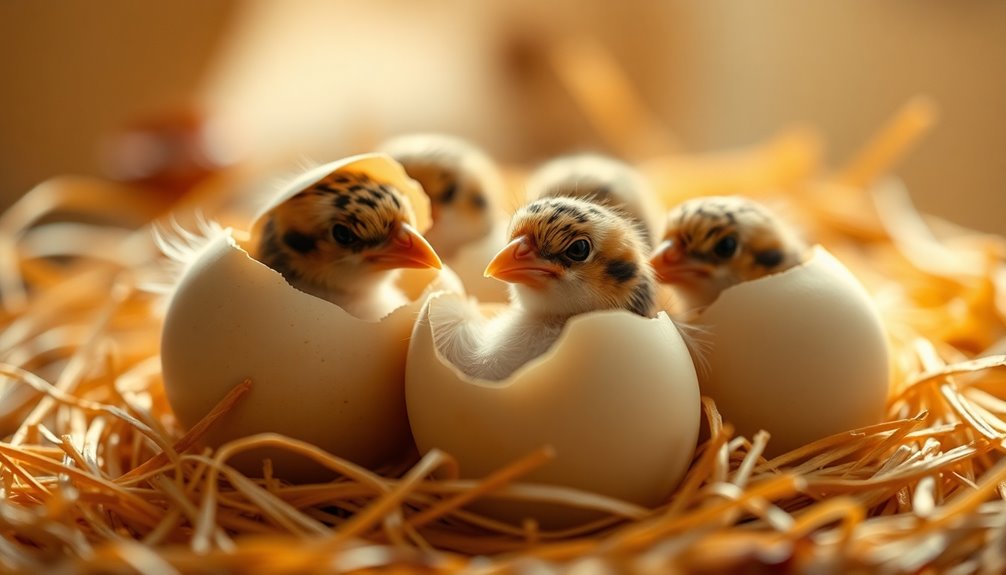
The lockdown process is a vital phase in quail egg incubation, starting on day 16. During this time, you'll need to remove the eggs from the turning trays and place them in a stable position within the incubator. This preparation allows the chicks to hatch more easily.
It's important to increase the humidity levels to 70-80% to facilitate the hatching process, preventing the membranes from drying out. Remember, patience is key here. Chicks typically begin to hatch on days 18 or 19, but some may surprise you by hatching earlier or later.
Avoid opening the incubator during lockdown to maintain those vital humidity levels and provide a stable environment for your hatching chicks.
Caring for Newly Hatched Chicks

Caring for newly hatched quail chicks is essential for their survival and growth. Start by keeping them in the incubator for 12-24 hours to dry off and gain strength.
Once ready, monitor their activity levels and look for the small white egg tooth on their beaks, indicating they're prepared for the brooder.
Here's what to do next:
- Maintain the brooder temperature: Set it to 95°F (35°C) for the first week, reducing by 5°F weekly until they're fully feathered.
- Feed with gamebird starter crumbles: Verify the crumbles have 27% protein for peak growth.
- Provide clean water: Use specialized waterers to prevent drowning and keep the chicks hydrated.
Tips for Successful Hatching

When you're ready to hatch quail eggs, getting the conditions just right is essential for success.
Maintain an incubation temperature of 99.5°F and keep humidity levels at 40-50% for the first 15 days. From day 16, increase humidity to 70-80% for the lockdown period.
Turn the eggs 3-5 times daily from days 1 to 14, then stop on day 15 to prepare for hatching. Candle the eggs around day 7 to check for viability and remove any non-viable ones.
Expect your hatched quail chicks around days 18 or 19; avoid opening the incubator during this vital time.
Once hatched, let the chicks stay in the incubator for 12-24 hours before transferring them to a brooder with starter feed.
Frequently Asked Questions
How to Care for Newly Hatched Quail Chicks?
To care for newly hatched quail chicks, keep them in the incubator for 12-24 hours to dry off and regain strength.
Once transferred to a brooder, maintain a temperature of 95°F for the first week, lowering it gradually.
Feed them gamebird starter crumbles with 27% protein, mashing it for younger chicks.
Use shallow water dishes to prevent drowning, and guarantee they've constant access to clean food and water.
Monitor their activity regularly.
What to Do After Quail Eggs Hatch?
So, you've just witnessed the miracle of life! After your quail eggs hatch, leave the chicks in the incubator for 12-24 hours. This helps them dry and regain strength.
When you transfer them to the brooder, keep the temperature around 95°F for the first week, gradually lowering it. Offer them high-protein starter feed and clean, shallow water.
Always watch for any distress signs and maintain a calm environment to support their growth.
How Long Can a Baby Quail Stay in the Incubator After Hatching?
After hatching, a baby quail can stay in the incubator for 12-24 hours. This allows them to dry off and gain strength from the yolk they've absorbed.
You'll want to keep an eye on their activity levels; they should be lively and fluffy before moving them to a brooder.
It's essential not to open the incubator during this time, as maintaining stable temperature and humidity is critical for their health.
How to Store Quail Eggs for Hatching?
To store quail eggs for hatching, keep them at room temperature, ideally around 55°F (13°C), and position them pointy end down.
This helps maintain the air cell inside the egg. Check for cracks upon arrival and discard any damaged eggs.
Rotate them gently every few days to prevent the embryo from sticking to the shell.
Use a clean, dry container, avoiding excessive temperature fluctuations and humidity to guarantee the best viability.
Conclusion
So, as you commence your quail hatching journey, remember that patience and care are your best allies. With the right breed, a well-set incubator, and attentive monitoring, you'll watch those tiny eggs transform into lively chicks, like magic unfolding before your eyes. Embrace the joy of nurturing them as they grow, and you'll find that each hatch is not just a process, but a rewarding adventure full of delightful surprises. Happy hatching!