
To slash hay waste with your round bale feeder, focus on proper placement, height, and securing the bale. Choose a dry, level spot with plenty of space around the bale for easy access and minimal spillage. Use straps or chains to hold the bale steady, especially in windy conditions. Adding accessories like bale wraps or durable feeders helps reduce spoilage. Keep an eye on setup and maintenance for long-lasting efficiency—more tips await if you keep exploring.
Key Takeaways
- Place bales on well-drained, open ground with at least 2 feet clearance to minimize hay scattering and spoilage.
- Adjust bale height and spacing for animal comfort and easy access, reducing trampling and waste.
- Reinforce bales with straps or chains and anchor securely to prevent movement in windy or wet conditions.
- Use bale wrapping and durable feeder accessories to extend hay freshness and limit spillage.
- Regularly inspect and maintain feeder setup, repositioning bales as needed to ensure even feeding and minimize waste.
Why Proper Bale Placement Saves Money and Reduces Waste
Proper bale placement is essential because it directly impacts how much feed your livestock consumes and how much waste you generate. When placing bales, consider bale moisture levels; overly wet bales spoil quickly and increase waste, raising feeding costs. Weather considerations are also vital—placing bales in areas protected from rain and snow helps prevent moisture absorption, keeping feed dry and nutritious. Proper placement reduces the need for frequent cleanups and prevents livestock from trampling or wasting feed. Additionally, strategic positioning minimizes the exposure of bales to elements that accelerate spoilage, saving you money over time. Incorporating energy-efficient storage solutions can further enhance sustainability and reduce spoilage risks. Proper bale stacking techniques can also improve airflow and decrease spoilage during storage, especially when combined with adequate ventilation systems. Using appropriate covering materials can provide extra protection against weather and extend the shelf life of stored feed.
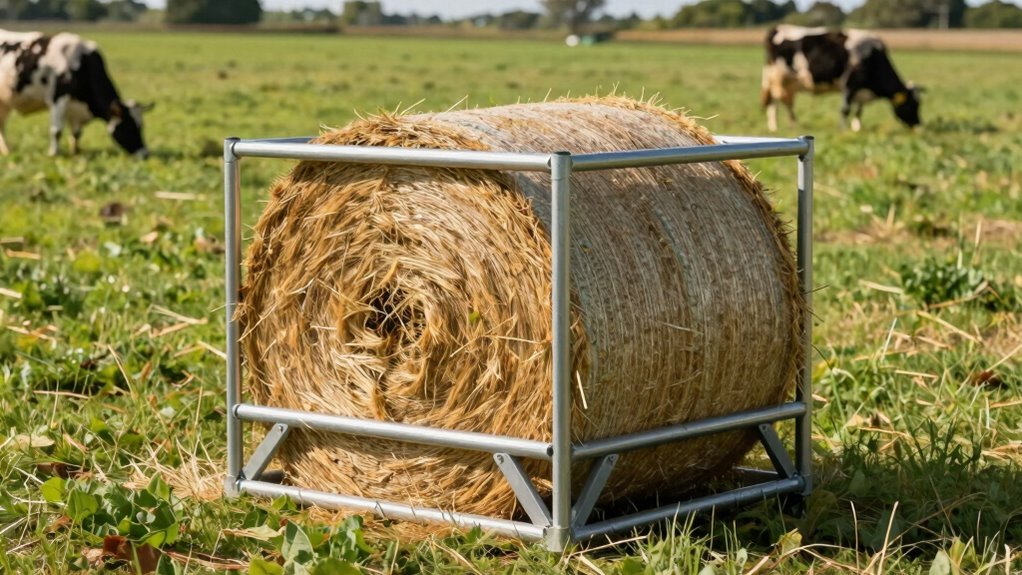
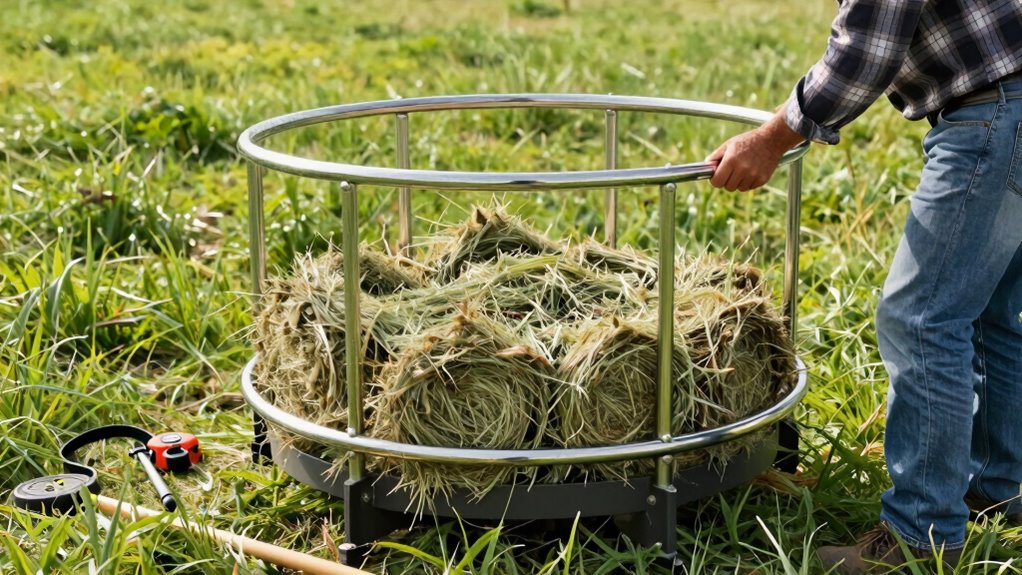
Choosing the Best Location for Your Round Bale Feeder
Choosing the right location for your round bale feeder can considerably influence feed efficiency and waste reduction. Place the feeder on solid, well-drained ground to prevent the bale material from sinking and becoming difficult to access. Select an open area that minimizes wildlife interference, such as deer or raccoons, which can trample or scatter the hay. Keep the feeder away from heavily wooded areas or dense brush where animals may lurk or disturb the feed. Positioning it in a spot that’s easily accessible for daily feeding and clean-up also helps reduce waste. Additionally, choosing a location that’s sheltered from harsh weather can protect bale material from the elements, prolonging its freshness and reducing spoilage. Proper site selection can also help prevent ground erosion and maintain the longevity of your feeding area. Incorporating proper drainage solutions can further enhance the area’s effectiveness in managing runoff and moisture. Considering natural windbreaks can also help shield the hay from strong winds that might scatter or spoil it. Selecting a site with adequate shelter can further mitigate weather-related spoilage and preserve feed quality. Installing appropriate barriers around the feeder may also discourage animals from trampling or wasting hay.
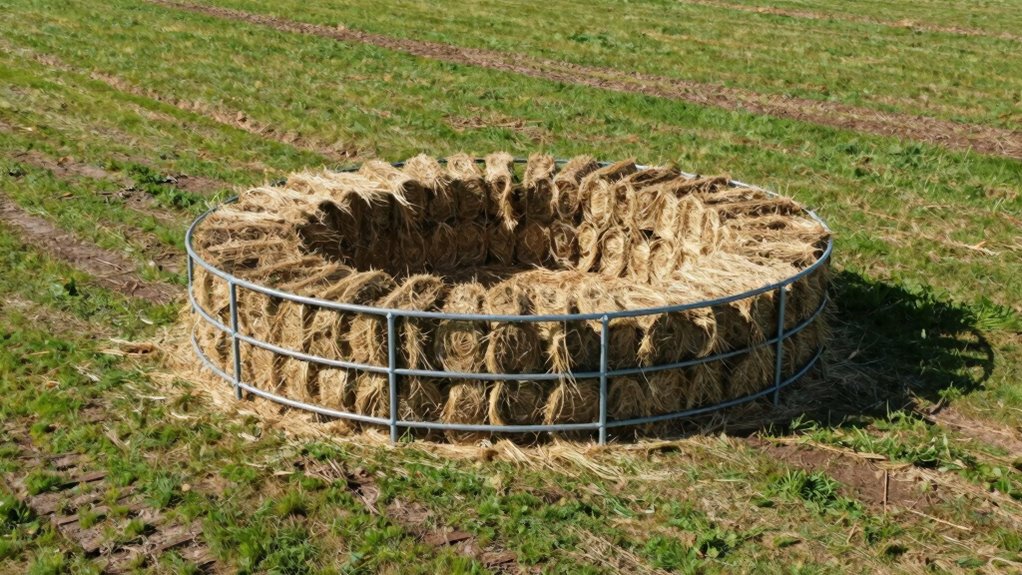
Adjust Bale Height and Spacing for Better Use

Adjusting the bale height and spacing can substantially improve feed accessibility and reduce waste. Start by setting the bale height so animals can comfortably reach the center of the bale without strain. If it’s too high, animals may struggle to eat evenly, leading to waste. Too low, and it might cause trampling or soiling. Proper bale spacing is equally important; space out the bales enough to prevent crowding but keep them close enough for easy access. Ensure there’s enough room for animals to move around without knocking over or spilling feed. Regularly check and modify the bale height and spacing as animals grow or behavior changes. Incorporating auditory cues can also reinforce proper feeding behaviors and improve overall efficiency. These simple tweaks can make a big difference in maximizing feed use and minimizing waste.
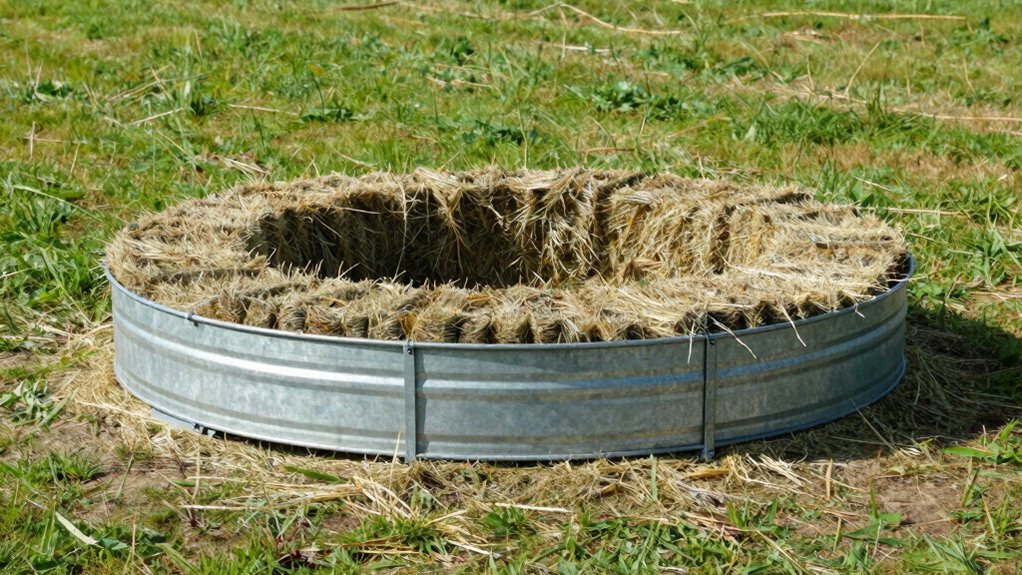
Tips to Secure Your Bale and Prevent Spillage

To prevent bale spillage and guarantee animals stay safe, securing the bale firmly to the feeder is essential. Start by checking the bale’s moisture level—drier bales are less likely to fall apart. Next, consider weather considerations; if rain or wind is forecasted, reinforce the bale to prevent shifting or toppling. To secure your bale effectively, you can: 1. Use sturdy metal straps or chains to clamp the bale tightly to the feeder frame. 2. Place stakes or posts around the bale to hold it in place during gusts. 3. Add some weight or extra support at the base to stabilize the bale on wet or windy days. These steps help minimize spillage and keep your bale secure, regardless of moisture or weather conditions. Additionally, implementing simple organizing strategies can make securing bales easier and more effective over time. Incorporating proper bale handling techniques can further improve stability and reduce waste in your feeding setup. Recognizing the importance of herbalism in maintaining animal health can also be beneficial for holistic farm management. Proper weather monitoring can help you anticipate and respond to changing conditions, ensuring your bale remains secure. Understanding projector technology can provide insights into optimizing your setup for better visibility.
Common Setup Mistakes and How to Avoid Them
One common mistake is placing the bale too close to the sides, which can cause feed wastage and make access difficult for animals. Ignoring enough space around the feeder also leads to congestion and limits movement. To avoid these issues, guarantee proper bale placement and leave sufficient access space for your animals. Additionally, understanding common setup mistakes can remind you to plan your setup carefully to prevent unintentional mishaps. Being aware of equipment placement and ensuring correct measurements can help ensure a more efficient and waste-free feeding process. Proper bale positioning is essential to minimize hay waste and promote animal comfort. Incorporating feed management strategies can further optimize your setup and reduce overall waste.
Improper Bale Placement
Improper bale placement is a common mistake that can lead to wasted feed, increased waste, and even safety hazards. When you place a bale too close to the feeder edge, you risk animals pushing it out, spilling hay and increasing waste. If the bale size or weight isn’t matched to the feeder’s design, it can cause uneven distribution or tipping hazards. Imagine these scenarios:
- A heavy bale sits unevenly, tipping over when animals try to access it.
- A too-small bale shifts easily, scattering feed outside the feeder.
- An oversized bale blocks access, forcing animals to crowd or injure themselves.
To avoid these issues, select the right bale size and weight for your feeder, position it centrally, and ensure it’s stable. Proper placement minimizes waste and keeps your animals safe.
Neglecting Access Space
Neglecting to leave enough access space around the bale can cause significant problems during feeding. Insufficient access space makes it hard for animals to reach the bale evenly, leading to waste and uneven consumption. Proper bale placement includes enough room for animals to comfortably access all sides. Without adequate access space, animals may crowd or trample the hay, increasing waste. To avoid this, plan for a clear zone around the bale, ensuring smooth feeding and minimal waste. Remember, the right access space improves efficiency and reduces feeding stress. Here’s a quick guide to bale placement:
| Access Space | Benefits | Recommendations |
|---|---|---|
| 2-3 feet | Easier feeding, less waste | Leave at least 2 feet around the bale |
| 4 feet | Improved animal access | Ensure enough room on all sides |
| Less than 2 feet | Limited access, waste | Increase access space for better results |
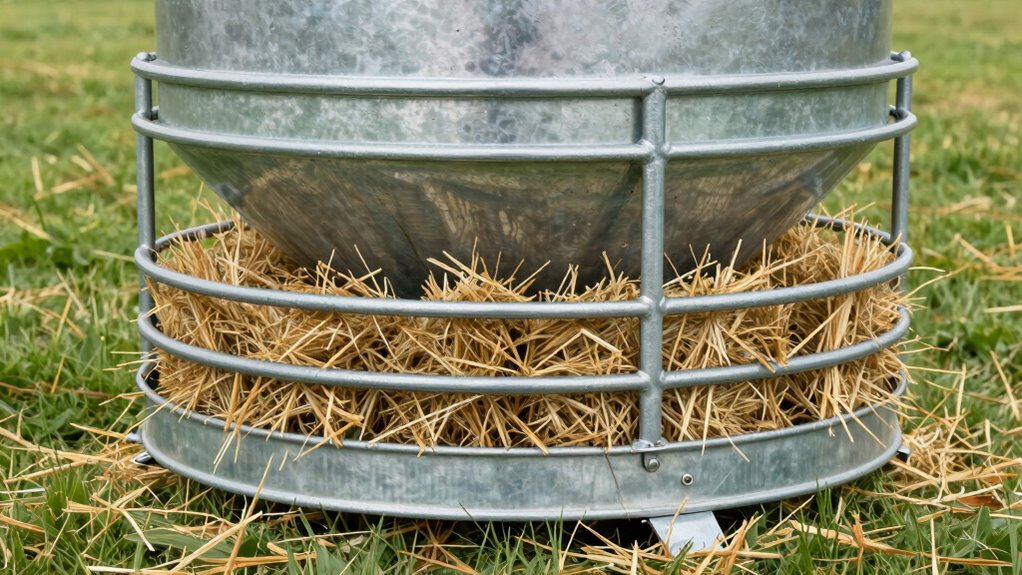
Accessories That Help Reduce Hay Waste

Using the right accessories can considerably cut down hay waste when feeding with a round bale feeder. First, consider bale wrapping; it keeps hay fresh longer, reducing spoilage and the temptation for animals to pull out unnecessary amounts. Second, invest in durable, easy-to-clean feeder accessories like removable rings or skirts, which help limit hay spillage. Third, ensure regular feeder maintenance—tightening loose parts and checking for sharp edges prevents unnecessary hay loss and prolongs the equipment’s lifespan. Additionally, choosing free floating bale feeders can enhance hay utilization and reduce waste by allowing animals to access hay more naturally. These accessories work together to minimize waste, save you money, and keep your feeding area tidy. Proper bale wrapping, waste reduction techniques, and routine feeder upkeep are essential for efficient feeding and reducing hay waste without extra effort. Incorporating essential oils for waste reduction can also promote a healthier environment by minimizing mold and spoilage through natural antimicrobial properties. Implementing proper feeder placement can further optimize hay intake and minimize spillage around the feeding area. Moreover, understanding the weight of the machine can help in planning safe and effective transportation and installation.
Monitoring and Maintaining Your Bale Feeder for Long-Term Efficiency
Regularly monitoring and maintaining your bale feeder guarantees it operates efficiently over time. Check that the bale rotates smoothly to prevent uneven feeding and minimize waste. Keep an eye on weather considerations, such as snow, rain, or high humidity, which can cause rust or mold and affect functionality. Clear debris or mud buildup around the feeder to ensure proper movement and reduce strain on parts. Inspect for signs of wear or damage, especially on moving components, and address issues promptly. Cover or shield the feeder from harsh weather to prolong its lifespan. Consistent maintenance not only extends the equipment’s durability but also helps keep hay waste low, saving you money and effort in the long run.
Troubleshooting and Making Adjustments During Setup
As you set up your bale feeder, it’s important to check that the bale size matches the feeder’s specifications. If things aren’t aligning properly, adjust the tine position to improve stability. Additionally, make sure the bale is centered to prevent uneven feeding and guarantee smooth operation.
Check Bale Size Compatibility
Have you double-checked that the bale size matches your feeder’s specifications before proceeding? Ensuring proper equipment compatibility is essential for efficient feeding. Visualize these steps:
- Place a bale next to the feeder, comparing its diameter and width to the feeder’s capacity.
- Confirm that the bale’s size fits comfortably within the opening without forcing or excessive gaps.
- Check if the bale’s shape allows it to roll smoothly without getting stuck or causing damage.
If the bale is too large or too small, it could lead to uneven feeding or equipment strain. Adjustments may be necessary to match the bale size with your feeder’s specifications, preventing issues and ensuring peak performance. Always prioritize compatibility for smooth operation.
Adjust Tine Positioning
If you notice the bale isn’t feeding smoothly or the feeder is jamming, adjusting the tine positioning can often resolve these issues. Proper bale alignment is key, so make sure the tines are positioned to grip the bale evenly. Move the tines closer together or farther apart to improve bale contact and prevent slipping. Adjusting tine height may also help if the bale isn’t rolling correctly. Use the following table as a guide:
| Issue | Solution |
|---|---|
| Bale slipping or jamming | Realign the tines for better grip |
| Bale not feeding smoothly | Adjust tine positioning for even contact |
| Bale rolls unevenly | Fine-tune tine height and spacing |
| Tines not catching bale | Check and modify bale alignment |
| Feeder jams frequently | Ensure proper tine positioning |
Correcting tine positioning improves bale alignment, reducing waste and jams.
Ensure Proper Bale Centering
Ensuring the bale is properly centered is essential for smooth feeding and preventing jams. Start by checking the bale’s position and adjusting the bale anchoring system if needed. Consider weather conditions; if it’s windy or rainy, reposition the bale or secure it more tightly to prevent shifting. To verify proper centering:
- Confirm the bale sits evenly in the feeder, with no overhang or tilt.
- Adjust the side supports or chains to keep the bale aligned.
- Test the bale’s stability by gently pushing it—if it moves, re-anchor or tighten the restraints.
Weather considerations may require extra securing to prevent movement, ensuring the bale stays centered during adverse conditions. Proper centering minimizes waste and keeps feeding efficient.
Frequently Asked Questions
How Often Should I Rotate the Bale Within the Feeder?
You should rotate the bale within the feeder every few days to maintain ideal bale rotation and maximize feeder efficiency. Regularly moving the bale prevents overgrazing in one area and keeps the hay fresh for your animals. By rotating the bale consistently, you reduce waste and ensure your livestock have continuous access to quality feed. Keep a schedule that fits your herd’s eating habits for the best results.
What Safety Precautions Are Recommended During Setup?
Think of setup as steering a minefield—you need sharp eyes and proper gear. Always wear safety gear like gloves, boots, and eye protection to shield yourself from potential hazards. Be aware of moving parts and sharp edges that could cause injury. Clear the area of obstacles, and handle equipment carefully. Staying alert and cautious during setup helps prevent accidents, making the process safer and smoother for you and your livestock.
Can I Customize the Feeder Size for Different Livestock?
Yes, you can customize the feeder size to match your livestock’s needs. Adjust the feeder dimensions to guarantee it’s compatible with different livestock, like cattle or goats. Measure their size and eating habits, then modify the feeder accordingly. This way, you provide enough space and minimize hay waste. Customizing the dimensions makes the feeder more efficient and safe, ensuring your animals stay comfortable and healthy while reducing waste.
How Do Weather Conditions Affect Bale Placement?
Irony strikes again—weather impact can be surprisingly influential on bale placement. You’ll want to take into account wind, rain, and snow, which can spread hay or spoil it quickly. Proper placement considerations mean putting bales in sheltered spots or on elevated ground to prevent runoff and spoilage. This way, you minimize waste and keep your livestock fed, regardless of the weather’s unpredictable whims. It’s a smart move that pays off in the long run.
What Are Signs of Wear and When to Replace Parts?
You’ll want to watch for wear indicators like cracks, rust, or bent components on your feeder parts. When these signs appear, it’s time for replacement to prevent further damage and maintain efficiency. Follow a regular replacement schedule based on usage and manufacturer guidelines, especially for parts exposed to weather or heavy use. Staying proactive guarantees your feeder stays reliable, reducing hay waste and avoiding costly repairs later.
Conclusion
Setting up your round bale feeder properly is like tending a garden—you plant the seeds of good habits now to enjoy a thriving, waste-free harvest later. By paying attention to placement, securing the bale, and using helpful accessories, you’re cultivating efficiency and saving money. Keep monitoring and adjusting as needed, and you’ll create a well-oiled system that minimizes waste and maximizes your herd’s health. With patience and care, your setup will flourish like a well-tended landscape.