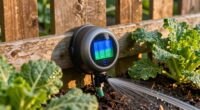
To guarantee your drip tape waters roots directly instead of just paths, you need to space it based on crop type, root zone, and soil. Properly positioning your drip lines near the root zone and maintaining consistent spacing prevents dry spots and runoff. Closer spacing benefits high-demand crops, while wider spacing suits lower needs. If you continue exploring, you’ll discover expert tips to optimize your system and improve water efficiency.
Key Takeaways
- Position drip tape close to roots, within a few inches of soil surface, to ensure effective water absorption.
- Maintain consistent spacing between drip lines aligned with root spread to promote uniform watering.
- Adjust spacing based on crop growth stage, increasing distance as roots deepen.
- Consider soil type; tighter spacing in sandy or compacted soils improves water delivery.
- Avoid embedding tape too deep; keep it near roots to prevent dry spots and water wastage.

Tondiamo 500 ft 5/8 Inch Drip Tape Irrigation Tubing Kit 8 Mil 6" Spacing Hose Garden Landscape Irrigation System Automatic Equipment for Farms
Comprehensive Irrigation Package: our drip tape irrigation kit includes 500 ft long 5/8 inch irrigation tube that offers…
As an affiliate, we earn on qualifying purchases.
As an affiliate, we earn on qualifying purchases.
Why Proper Drip Tape Spacing Ensures Healthy Roots and Water Efficiency
Proper drip tape spacing is essential for delivering water evenly across your crop roots. When spaced correctly, your drip tape promotes healthier root development by ensuring each plant receives consistent moisture. Proper spacing also enhances drip tape longevity by reducing pressure buildup and minimizing the risk of leaks or damage. This efficient water distribution helps conserve water, preventing runoff and water wastage. With well-planned spacing, your crops get the right amount of water directly at their roots, encouraging strong growth and higher yields. Additionally, even watering reduces disease risks associated with over- or underwatering. Overall, proper drip tape spacing is a smart investment that maximizes water efficiency and supports sustainable farming practices.

5/8" Drip Tape 3281FT, 6" Spacing Roll,16 Mil Garden Irrigation Tubing Hose, Adjustable Drip Tape Irrigation, Automatic Drip Irrigation System for Flowers, Plants, Fruits, 0.75 GPH/Hole
Efficient and Uniform Watering: Our 5/8" Drip Tape, with a generous 3281FT length and 6" spacing roll, is…
As an affiliate, we earn on qualifying purchases.
As an affiliate, we earn on qualifying purchases.
How to Determine the Best Drip Tape Spacing for Your Crops and Soil
To choose the best drip tape spacing, you need to contemplate your crop’s water requirements and how much moisture they need to thrive. Soil type also plays a key role, as different soils absorb and hold water differently. Understanding Free Floating systems can provide insights into more flexible and adaptable irrigation layouts. Additionally, considering the Regional Climate can influence watering schedules and spacing needs. Being aware of the Vetted irrigation products and their specifications can help you select the most reliable equipment for your setup. Analyzing Soil Moisture Retention characteristics can further assist in customizing your irrigation strategy to match your soil’s unique water-holding capacity. Examining Soil Texture and its impact on water absorption can refine your spacing decisions. Following spacing guidelines based on these factors will help you optimize your irrigation and improve crop health.
Crop Water Needs
How do you determine the most effective drip tape spacing for your crops and soil? Start by evaluating your plants’ water needs, which depend on their growth stage and type. Proper spacing ensures each plant receives adequate water, supporting healthy plant nutrition and ideal growth. Overly close spacing can lead to excessive moisture, promoting pests and disease, while too wide spacing risks under-watering. Consider your soil’s water retention capacity, as well as crop-specific water demands, to decide on the right spacing. Keep in mind that consistent watering improves pest management by reducing stressed plants that attract pests. Additionally, understanding the ear wax odor can provide insights into soil health and potential infections that may affect plant roots. It’s also important to assess soil texture because different soil types can influence how water moves and is retained, affecting drip tape placement. Adjust your drip tape layout based on these factors to deliver the right amount of water directly to roots, promoting healthy growth and minimizing water waste. Recognizing the importance of soil moisture levels can help fine-tune your drip irrigation strategy for optimal crop performance. Understanding soil health indicators can further guide adjustments to your watering practices for sustainable crop production.
Soil Type Factors
Soil type plays a significant role in determining the ideal drip tape spacing for your crops. If your soil has high compaction, water tends to move slowly, so closer tape spacing ensures roots receive adequate moisture. Conversely, loose, well-drained soils with high organic matter allow water to spread farther, which means you can space the drip tapes farther apart. Organic matter improves water retention and promotes better infiltration, reducing the risk of dry spots. Assess your soil’s texture and compaction levels to decide on the spacing that delivers consistent moisture without overwatering. Keep in mind that denser, compacted soils may require narrower spacing, while soils rich in organic matter can handle wider spacing, optimizing water delivery to your crops’ root zones. Additionally, understanding your soil’s water absorption capacity can help fine-tune your drip tape placement for optimal irrigation efficiency. Recognizing the soil texture helps in predicting how water moves through your soil profile, further refining your spacing decisions. For best results, consider conducting a soil test to precisely determine your soil’s properties and water-holding characteristics. Understanding how soil amendments influence water retention can also assist in adjusting your irrigation strategy for better crop health.
Spacing Guidelines
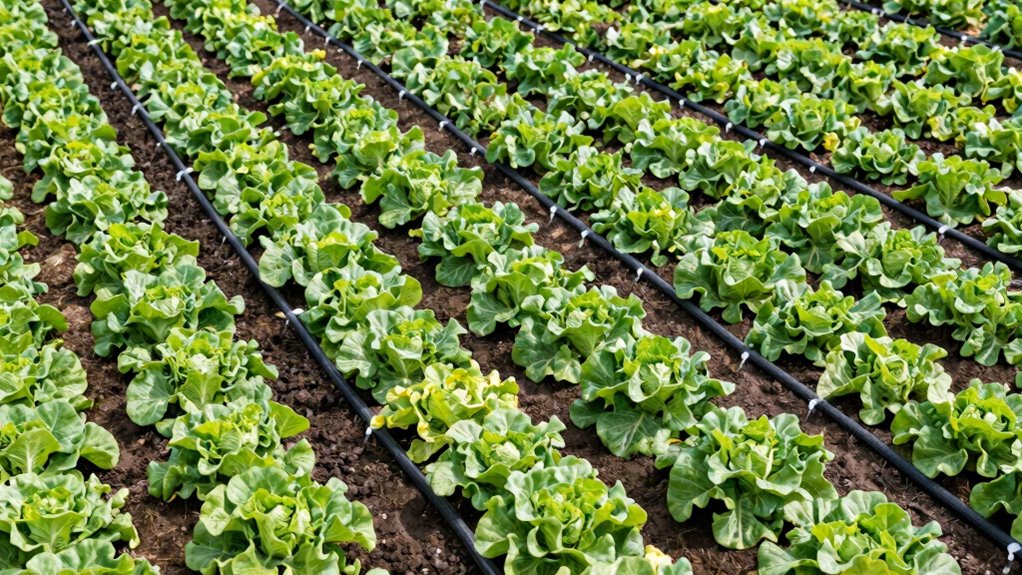
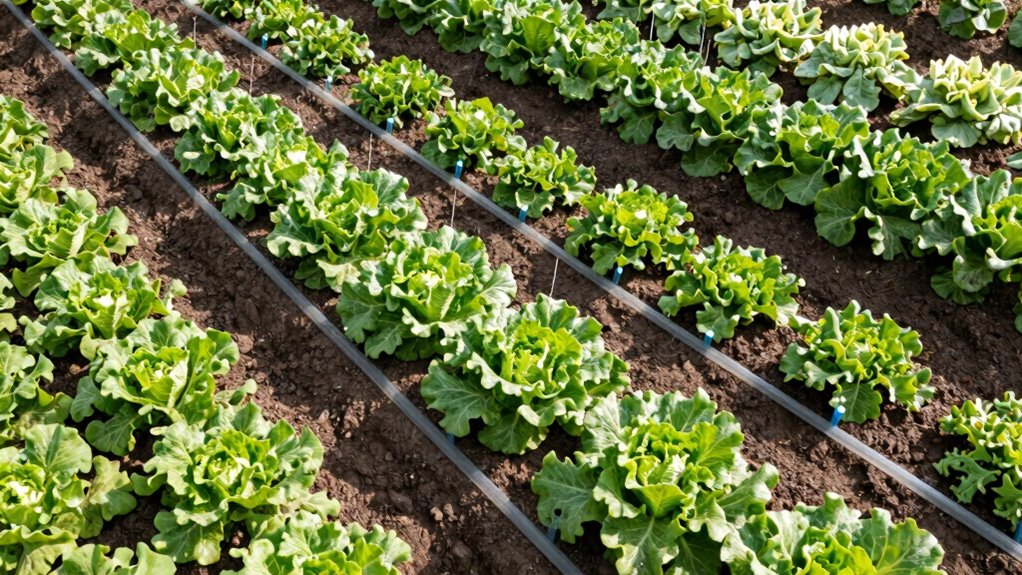
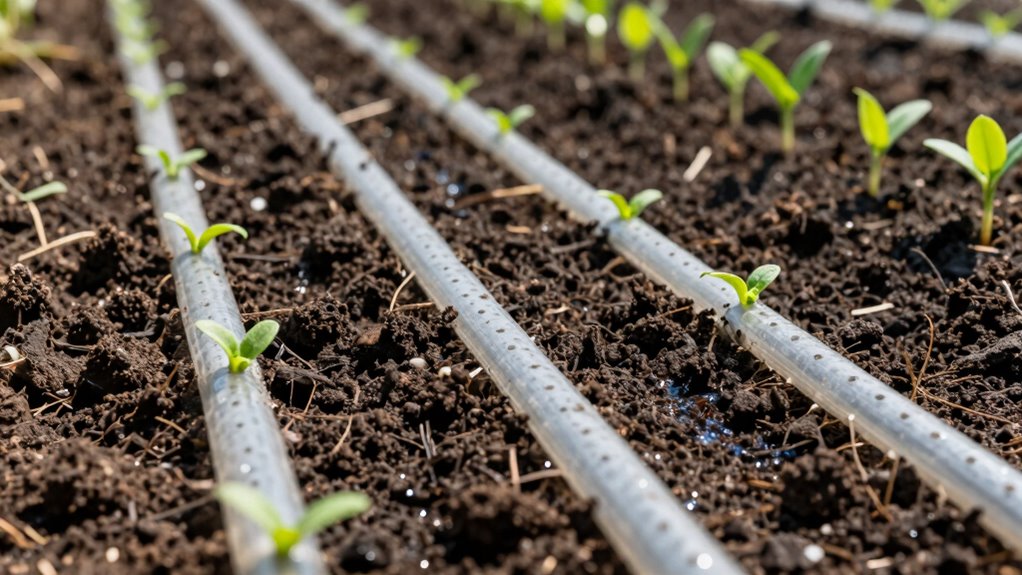
Determining the best drip tape spacing for your crops involves evaluating your specific soil conditions and crop water needs. Proper drip tape design guarantees even watering and prevents dry spots or overwatering. Typically, closer spacing provides better watering uniformity for high-demand crops or sandy soils that drain quickly. Wider spacing suits crops with lower water requirements or heavier soils that retain moisture longer. To optimize efficiency, consider your crop’s root zone depth and soil texture, adjusting tape placement accordingly. The goal is to deliver consistent moisture directly to roots without wasting water. Additionally, understanding water distribution uniformity helps ensure your irrigation system provides even coverage across your field. By carefully selecting drip tape spacing, you promote healthy growth, reduce runoff, and maximize water use efficiency, giving your crops the best chance to thrive.

MIXC 230FT Quick-Connect Drip Irrigation System Kit, Automatic Garden Watering System with 1/4" & 1/2" Fast-Lock Tubing – Adjustable Nozzles & Sprinklers for Garden, Greenhouse, Lawn, Potted Plants
✔Comprehensive Drip Irrigation Kit:MIXC drip irrigation system, equipped with a versatile range of components, caters to all your…
As an affiliate, we earn on qualifying purchases.
As an affiliate, we earn on qualifying purchases.
Common Mistakes When Laying Out Drip Tape That Waste Water
One of the most common mistakes when laying out drip tape is failing to maintain consistent spacing and alignment, which can lead to significant water waste. When spacing isn’t uniform, water may bypass roots or cause runoff, reducing efficiency. Misaligned tape can also result in drip tape leaks, especially if connections aren’t secure or if the tape is stretched unevenly during installation. These leaks not only waste water but can create pressure issues that further compromise the system. Proper installation techniques are essential to ensure even water distribution and system longevity. Installing drip tape with proper pressure regulation helps prevent leaks and ensures consistent watering. Installation challenges, such as steering through uneven terrain or avoiding obstacles, often tempt you to cut corners, but this can cause improper placement or damage to the tape. Additionally, understanding the pinball machine weight is crucial when planning for installation and movement of large irrigation components, as improper handling can lead to damage or inefficiency. Being aware of sustainable practices in irrigation can help in reducing environmental impact and promoting efficient water use. Incorporating system maintenance routines ensures that potential issues are identified early, prolonging the lifespan of your irrigation setup. Addressing these issues from the start ensures your system waters roots effectively, avoiding waste caused by poor layout choices.
THIRDREALITY Smart Soil Moisture Sensor Gen2 3Pack,Zigbee hub Needed, nhanced Signal Stability,Capacitive Moisture Monitoring,Garden Planting, Compatible with Hubitat,SmartThings,Home Assistant,Homey
Zigbee Hub Required: Compatible with standard Zigbee 3.0, such as Echo (4th Gen), Echo Plus (1st Gen and…
As an affiliate, we earn on qualifying purchases.
As an affiliate, we earn on qualifying purchases.
Best Practices for Installing Drip Tape to Target Roots Effectively
To target roots effectively, you need to maintain proper spacing between your drip tapes so water reaches the entire root zone evenly. Position the tape close to the roots, but avoid embedding it too deep, which can reduce efficiency. Paying attention to these details guarantees your watering is both precise and effective. Additionally, understanding the importance of consistent spacing can help prevent dry spots and promote healthy plant growth. Proper installation techniques ensure that water distribution remains uniform and that each plant receives adequate moisture. Using appropriate spacing during installation can significantly enhance water delivery efficiency and reduce waste. Implementing best practices in layout design can further optimize watering accuracy and plant health. Managing user consent preferences regarding cookies can also optimize your browsing experience and ensure your privacy is respected.
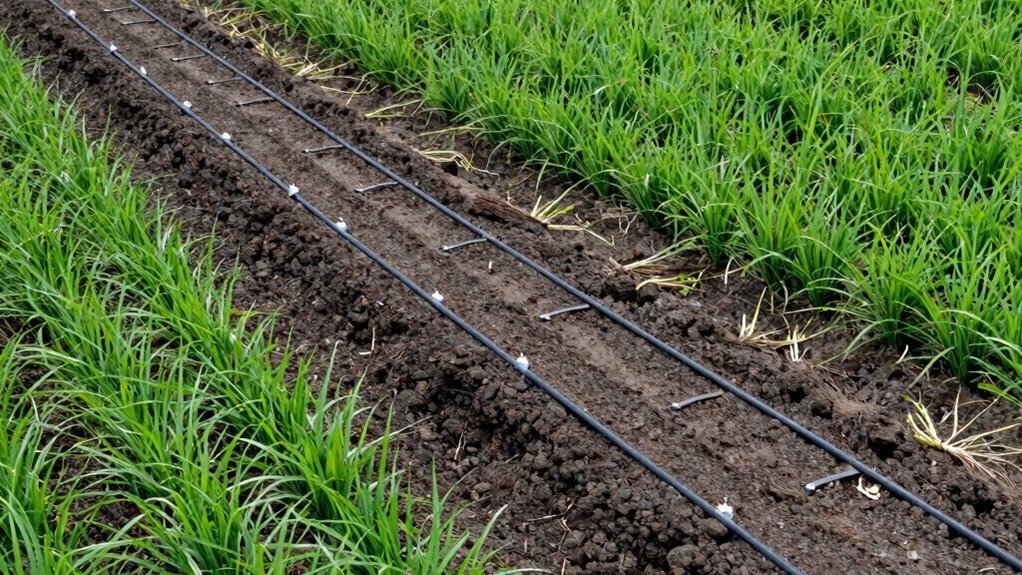
Maintain Proper Spacing
Proper spacing of drip tape is essential for delivering water efficiently and encouraging healthy root growth. You want to position the tape close enough to the mulch layer so water reaches the root zone without wastage. Maintaining consistent spacing between lines ensures uniform moisture distribution, preventing dry spots and over-saturation. Keep fertilizer placement near the drip tape to maximize nutrient uptake, as roots will access both water and nutrients simultaneously. Avoid gaps that could cause dry patches or overlaps that risk overwatering. Proper spacing also helps maintain soil structure and prevents water runoff. By carefully planning your layout and keeping the drip lines evenly spaced, you promote deep root development, which leads to stronger plants and healthier yields. Additionally, understanding the importance of plant parts and their optimal harvest timing can further enhance your gardening success.
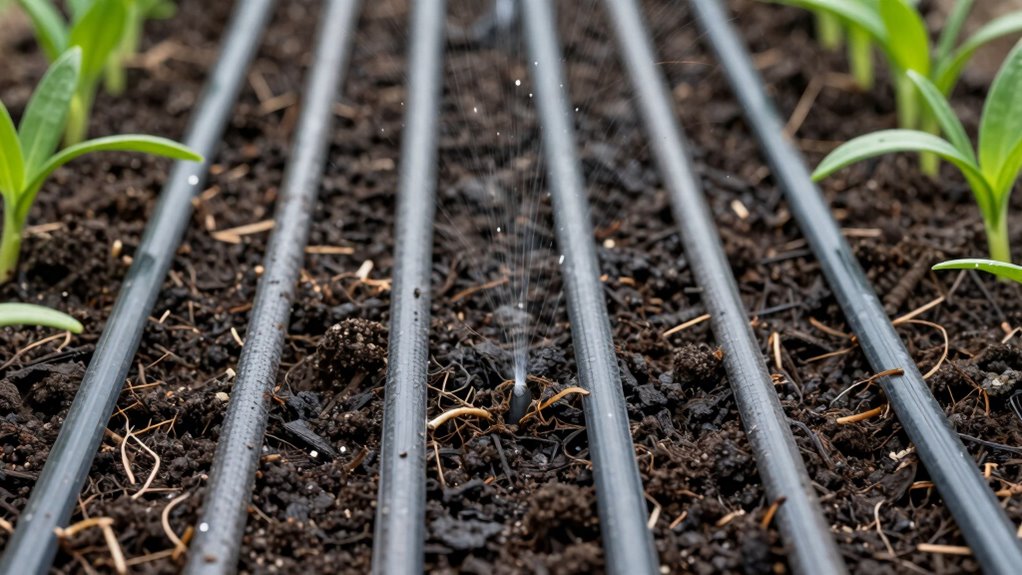
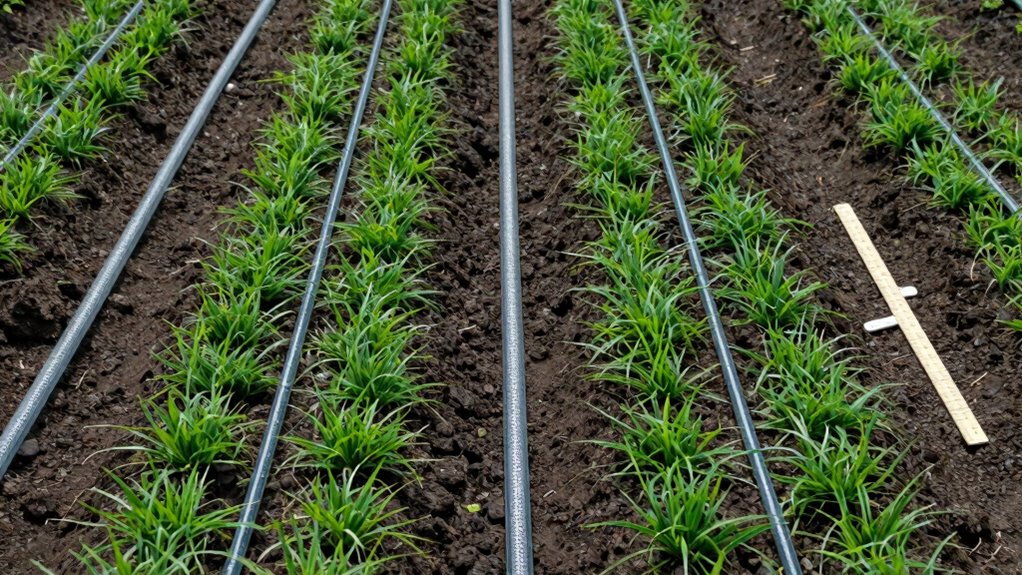
Position Near Roots
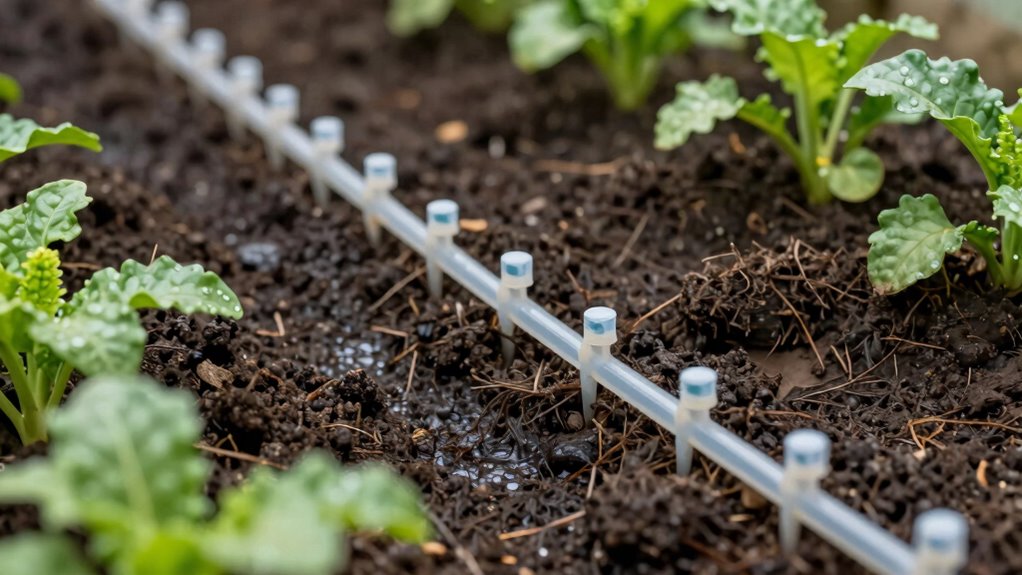
Have you positioned your drip tape close enough to the plant roots? Proper placement guarantees the water reaches the root zone effectively. Keep the drip tape within a few inches of the soil surface, directly above or beside the roots, to maximize soil proximity. If the tape is too far away, roots won’t receive adequate moisture, risking dry spots and uneven growth. Avoid burying the tape too deep, which can slow water absorption. For best results, follow the natural root spread and target the root zone specifically. Consistent proximity helps maintain healthy roots and optimizes water use efficiency. Remember, the goal is to deliver water where roots actively grow, avoiding excess soil distance that diminishes watering effectiveness.
Adjusting Drip Tape Spacing for Different Plant Growth Stages
Adjusting drip tape spacing as plants grow guarantees they receive adequate water at each stage. Early on, when plants are small, keep the tape closer to the roots to ensure proper hydration without waste. As root depth increases, space the drip lines farther apart to match the expanding root zone. This prevents overwatering and ensures water reaches deeper roots. Monitoring plant growth helps you determine when to shift the spacing—tighter during initial stages, wider as roots develop. Proper spacing also promotes even water distribution, supporting healthy growth and avoiding dry spots. By aligning drip tape placement with plant spacing and root depth, you optimize water delivery, conserve resources, and encourage robust development throughout each growth phase.
Troubleshooting Water Distribution Problems in Your Drip System
Water distribution problems in your drip system can disrupt plant health and waste resources if not addressed promptly. First, check for clogged emitters or uneven pressure, which can cause dry spots. Soil amendments, like organic matter, improve soil structure, helping water flow evenly and reducing blockages. Also, inspect for pests or burrowing animals that damage hoses or emitters, leading to inconsistent watering. Proper pest management prevents leaks and maintains system integrity. Ensure your filtration system is clean, as debris can clog lines. Regularly flush the system to clear buildup. Adjust pressure regulators if needed to ensure uniform water delivery. By maintaining soil health and controlling pests, you optimize water distribution, keeping roots properly hydrated and healthy.
Essential Tools to Measure and Optimize Drip Tape Placement
To guarantee your drip tape delivers water evenly across your garden, using the right tools to measure and position it accurately is essential. A tape measure or marked stakes help you maintain consistent spacing, preventing water from pooling or missing roots. A soil compaction tester ensures the ground is loose enough for ideal water infiltration, reducing runoff and dry spots. A level or laser tool helps keep the tape straight and at the correct depth. Additionally, inspecting mulch coverage around the tape helps prevent evaporation and soil compaction, ensuring water reaches the roots efficiently. Proper measurement tools and attention to soil and mulch conditions help you optimize drip tape placement, promoting healthy plant growth and efficient water use.
Real-World Examples of Effective Drip Tape Spacing Strategies
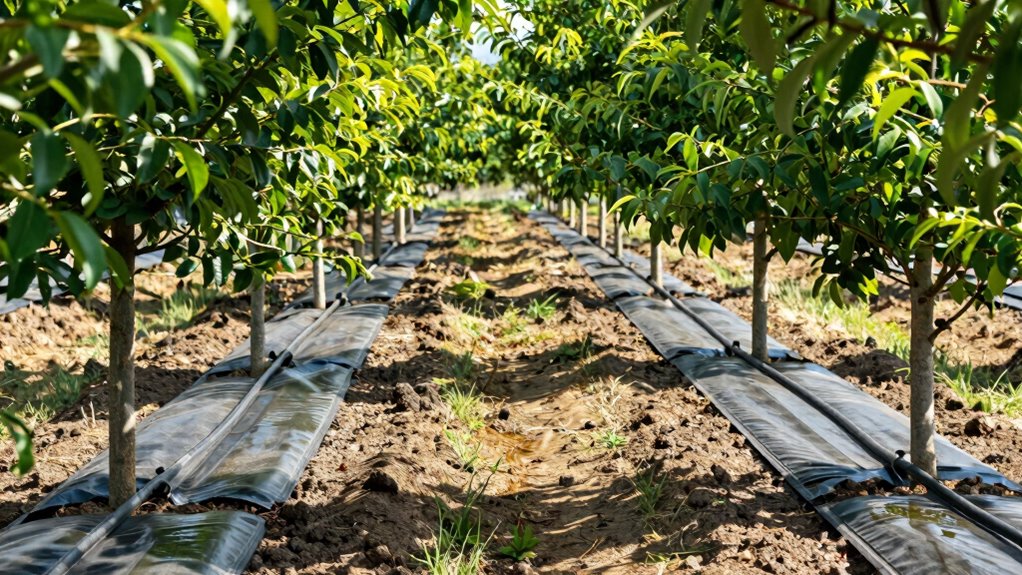
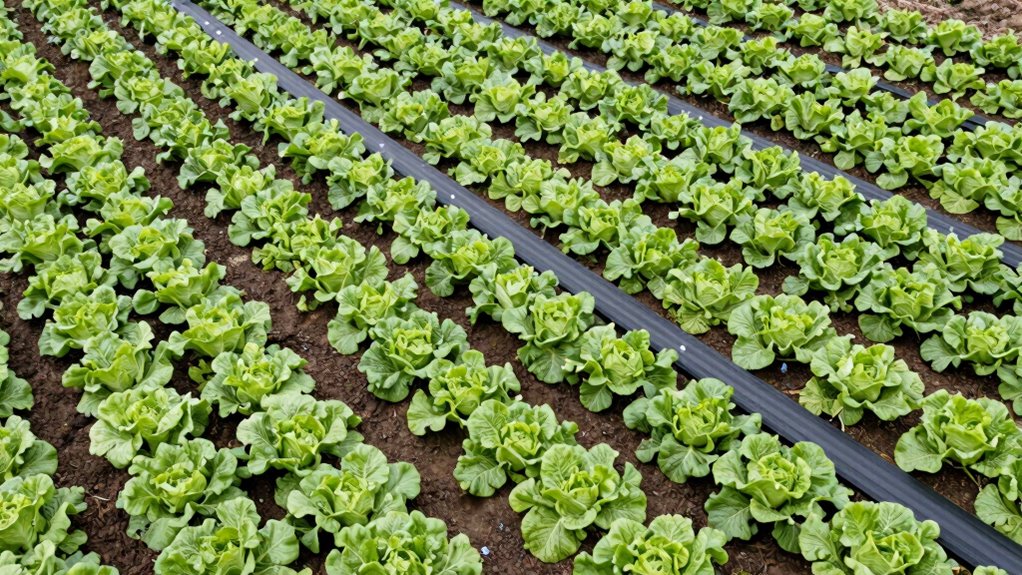
Implementing effective drip tape spacing requires understanding how different strategies work in real-world settings. One successful approach is using parallel drip tape patterns spaced 12 to 24 inches apart, ensuring even root zone coverage. For row crops, placing tapes on either side of the plants maximizes water delivery directly to roots, reducing runoff and evaporation. In orchard settings, wider spacing—around 24 inches—works well for tree canopies, providing adequate root zone coverage without overwatering. Adjusting spacing based on crop type, soil conditions, and plant size is essential for efficiency. These examples highlight that tailoring drip tape patterns to specific field conditions optimizes root zone coverage, delivering consistent moisture where plants need it most and avoiding water wastage.
Frequently Asked Questions
How Does Soil Type Influence Optimal Drip Tape Spacing?
Soil type greatly influences your ideal drip tape spacing. In compacted soils, you should space the emitters closer together to ensure adequate water penetration and avoid dry spots. Conversely, in soils with high water retention, wider spacing helps prevent overwatering and runoff. Adjusting spacing based on soil compaction and water retention ensures your roots get consistent moisture, promoting healthy growth and efficient water use.
Can Drip Tape Spacing Be Adjusted Mid-Season?
You can definitely adjust drip tape spacing mid-season, and it’s easier than finding a needle in a haystack! Use adjustment techniques like adding shorter sections or repositioning existing lines to improve watering efficiency. Spacing flexibility allows you to optimize water delivery based on plant growth or changes in soil conditions. Just be sure to plan carefully, so your roots stay happily hydrated without wasting water or creating dry spots.
What Are the Signs of Over- or Under-Watering Due to Spacing Issues?
If you notice uneven plant growth or wilting, you might be over- or under-watering due to spacing issues. High evaporation rates can cause dry spots, signaling under-watering, while consistently soggy soil suggests over-watering. Keep an eye on plant stress signs like yellowing leaves or stunted growth. Adjust your drip tape spacing to guarantee uniform water delivery, reducing evaporation losses and preventing stress. Proper spacing helps keep roots consistently moist and healthy.
How Does Crop Type Affect Ideal Drip Tape Placement?
You should adjust drip tape placement based on crop type, as taller or root-heavy plants need closer spacing to guarantee even water and fertilizer delivery. For crops susceptible to pests, proper spacing also helps with pest management by reducing moisture buildup. Keep in mind, compatibility with fertilizer is essential; some fertilizers may clog or damage tape if not properly matched. Tailoring your layout optimizes growth, minimizes issues, and enhances overall crop health.
Are There Specific Spacing Guidelines for Organic Versus Conventional Farming?
Yes, there are specific spacing guidelines for organic versus conventional farming. You should consider organic differences, such as soil health and crop density, which often require closer drip tape spacing—around 12 to 18 inches—to guarantee even watering and support soil vitality. In contrast, conventional methods might allow wider spacing of 18 to 24 inches, focusing on maximizing yield. Adjust your drip tape layout accordingly to optimize water delivery for each farming style.
Conclusion
When you get your drip tape spacing right, it’s like giving your plants a gentle, steady rain that reaches their roots rather than just watering the paths between. Proper layout boosts water efficiency and healthy growth, turning your garden into a thriving oasis. Keep experimenting and adjusting, and you’ll see your crops flourish like a well-tuned symphony. Trust in your planning—your plants will thank you with vibrant, plentiful harvests.