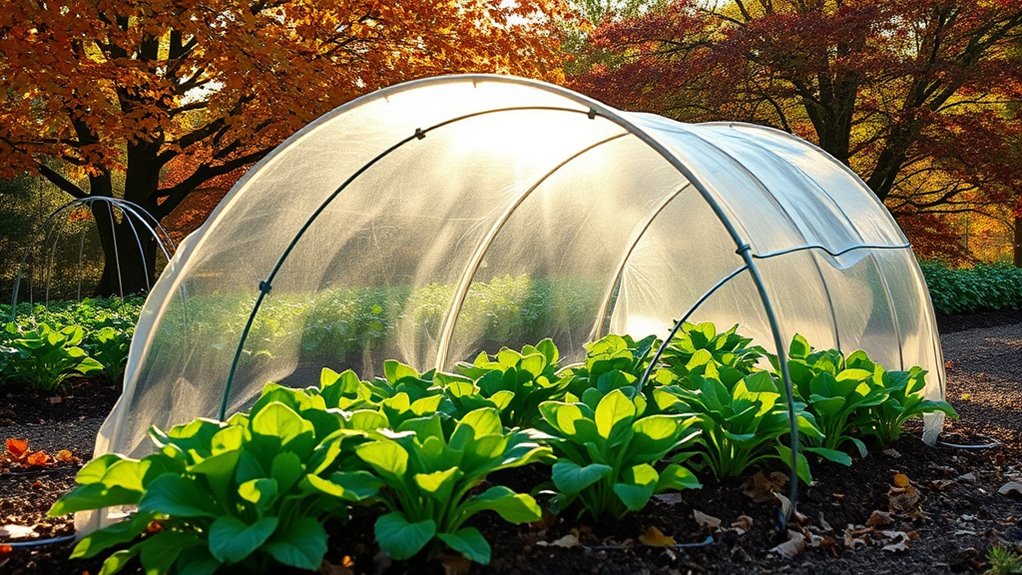
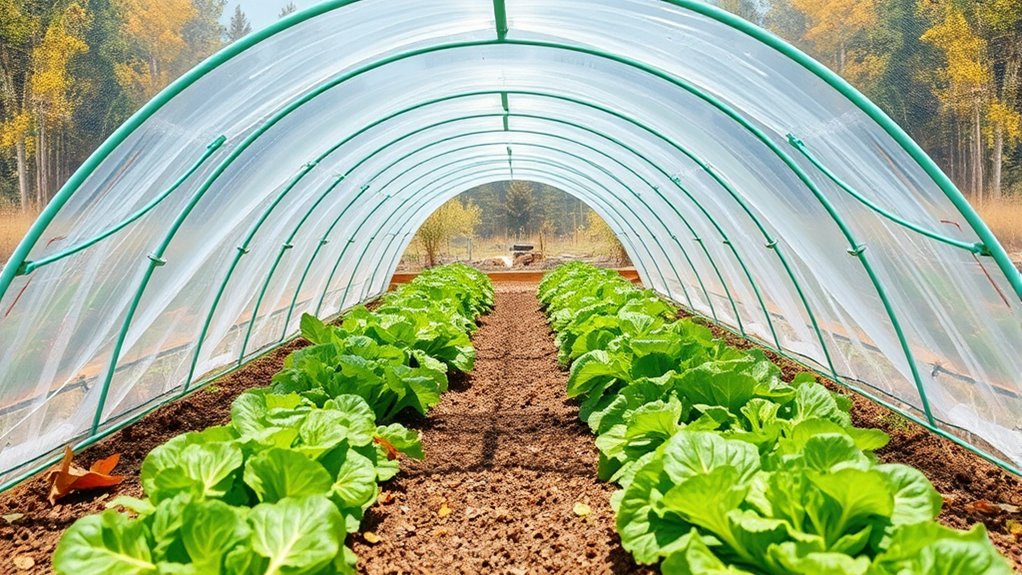
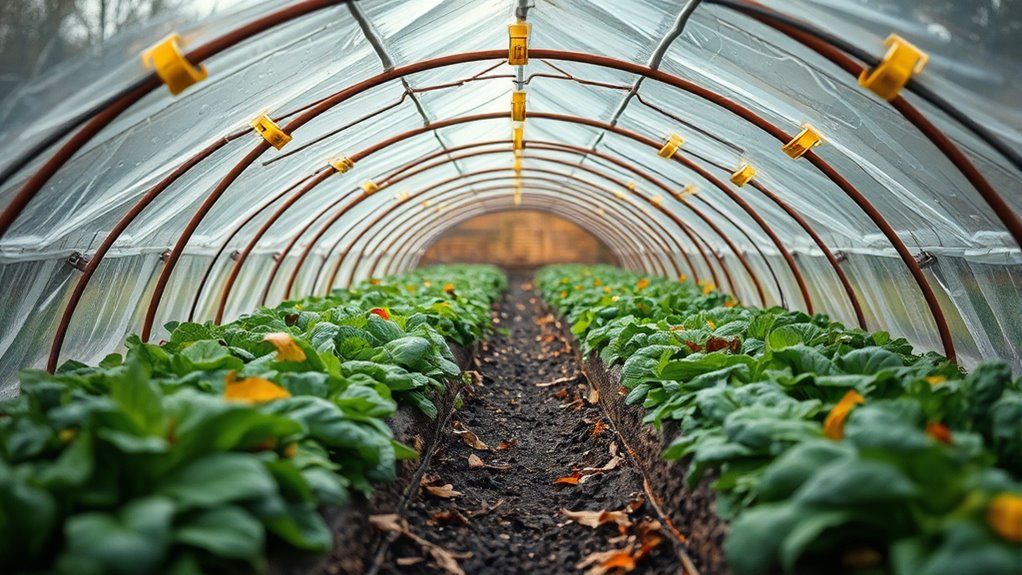
To build a simple low-tunnel for autumn greens, start by choosing a sunny, well-drained spot in your garden and clear the area of weeds. Gather PVC pipes or metal hoops and secure stakes, then shape your frame into an arch and anchor it firmly into the soil. Cover it with plastic or fabric, securing edges with stones or clips. Add vents and access points for ventilation and convenience. Continuing with these steps guarantees a sturdy, effective shelter for your greens as you explore further ideas next.
Key Takeaways
- Select a sunny, well-drained location with minimal shade and wind protection for the low-tunnel.
- Prepare the foundation by driving stakes deep and clearing weeds and debris from the site.
- Construct the frame using PVC pipes or metal hoops, anchoring supports securely into the soil.
- Cover the frame with lightweight plastic or fabric, fastening edges with stakes, clips, or weights.
- Install adjustable vents and support supports properly to ensure ventilation, stability, and easy access.
Gathering Materials and Tools
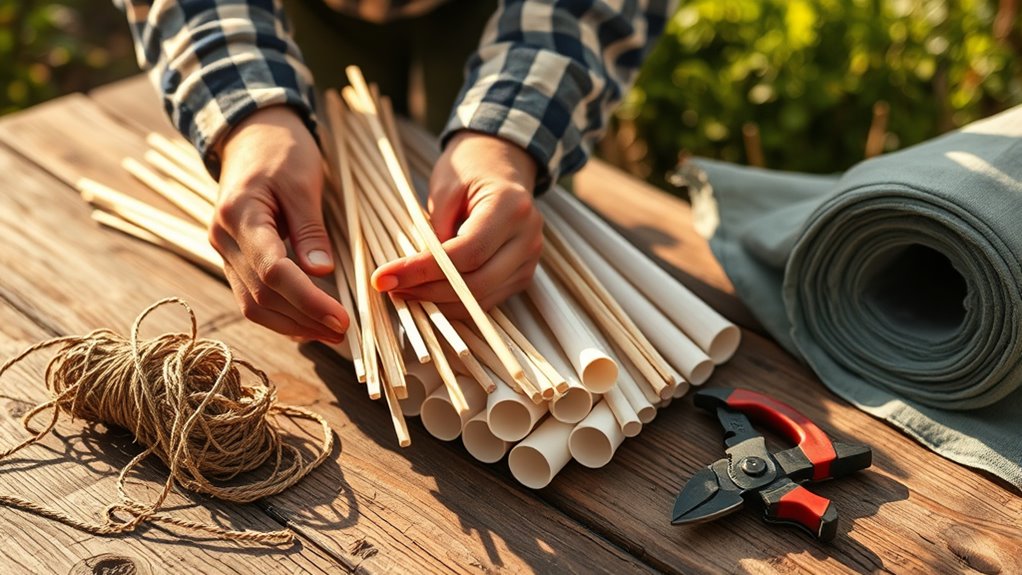
Before you begin building your low-tunnel, gather all the necessary materials and tools to guarantee a smooth process. For seasonal planting of autumn greens, you’ll need sturdy PVC pipes or metal hoops to form the tunnel frame. Use strong garden twine or clips to secure the cover material. For pest prevention, consider adding mesh or row covers that keep insects out while allowing airflow. You’ll also need scissors or a utility knife to cut the cover material, along with stakes or bricks to anchor everything securely. Make sure to have a measuring tape on hand to ensure proper dimensions. Having all these items ready beforehand helps you work efficiently and ensures your low-tunnel effectively protects your crops during the season’s growth.
Selecting the Ideal Location in Your Garden
Choose a spot in your garden that gets plenty of sunlight, as your greens will thrive with consistent light. Keep the location protected from strong winds to prevent damage to your low-tunnel. Considering these factors will give your autumn greens the best chance to grow healthy and strong. Additionally, selecting a well-drained site will help prevent excess moisture, which can harm your greens and reduce their growth. Ensuring the soil has good drainage will promote healthy root development and prevent waterlogging. A low-light environment can also be beneficial during cloudy days or early mornings to optimize plant health. Being aware of cookie categories and how they impact your browsing experience can help you better understand site management. Proper site selection is also important for privacy policy compliance and maintaining a secure environment for your garden.
Sunlight Exposure Needs
Ensuring your low-tunnel receives adequate sunlight is crucial for healthy autumn greens. Proper sunlight helps greens grow strong and boosts their flavor. When choosing a location, consider these factors: 1. Sunlight hours: Aim for at least 4-6 hours of direct sunlight daily. 2. Shade requirements: Some greens prefer partial shade; avoid overly shaded spots. 3. Watering schedule: Sunlit areas may dry out faster, so plan for regular watering. 4. Drainage and wind: Select a spot with good drainage and minimal wind exposure to prevent damage. Additionally, understanding the data privacy challenges can inspire you to optimize your garden setup for better growth conditions. Recognizing the importance of security zone info can help you protect your garden from potential threats and ensure a safe environment for your greens. A well-chosen environment is vital, as it directly impacts the credit card insights and overall success of your gardening efforts.
Protecting From Wind
Since wind can easily damage delicate greens and reduce their growth, selecting a sheltered spot is essential. Use windbreak strategies like planting hedges or placing fences to block strong gusts. Look for natural features such as walls, trees, or existing structures that can serve as windbreaks. When choosing a location, prioritize areas with natural wind resistance or add wind resistant materials like corrugated metal panels or burlap screens to further shield your greens. Position your low-tunnel behind these barriers for maximum protection. Proper placement minimizes wind stress, prevents damage, and promotes healthy growth. Additionally, understanding climate control options can help you create a more controlled environment, reducing the impact of external elements like wind. Incorporating microclimate management techniques can further enhance your garden’s resilience. Using windbreaks effectively can significantly improve the microclimate around your greens. Remember, reducing exposure to wind not only preserves your greens but also creates a more stable microclimate for successful autumn gardening. Implementing wind-resistant structures can provide long-term protection against unpredictable weather patterns, ensuring your greens thrive throughout the season.
Constructing the Frame for Your Low-Tunnel
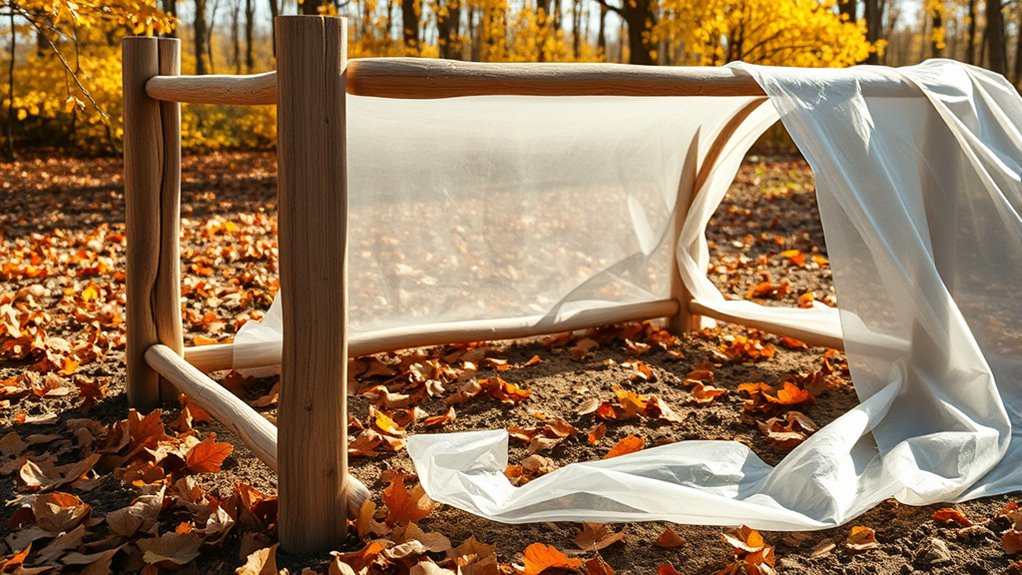
To build a sturdy frame for your low-tunnel, start by gathering the necessary materials, such as flexible PVC pipes or sturdy metal hoops, along with connectors and stakes. Proper soil preparation guarantees your greens grow healthy, so loosen the soil and remove weeds before assembly. When constructing the frame, keep pest prevention in mind by placing stakes deep into the ground and anchoring the hoops securely. Here’s what you’ll need:
Gather materials and prepare soil to build a sturdy, pest-resistant low-tunnel frame.
- Flexible PVC pipes or metal hoops
- Connectors to join the hoops
- Stakes to anchor the frame
- A mallet or hammer for securing stakes
Arrange the hoops in a gentle arc over your prepared soil, spacing them evenly. Secure each hoop into the ground, ensuring stability to withstand wind and pest intrusion. Additionally, using proper anchoring techniques can help prevent the frame from shifting or collapsing and can also contribute to the stability of your low-tunnel. Incorporating soil quality improvements can enhance the overall health of your autumn greens. Paying attention to weather conditions during construction can help ensure your tunnel remains resilient throughout the season.
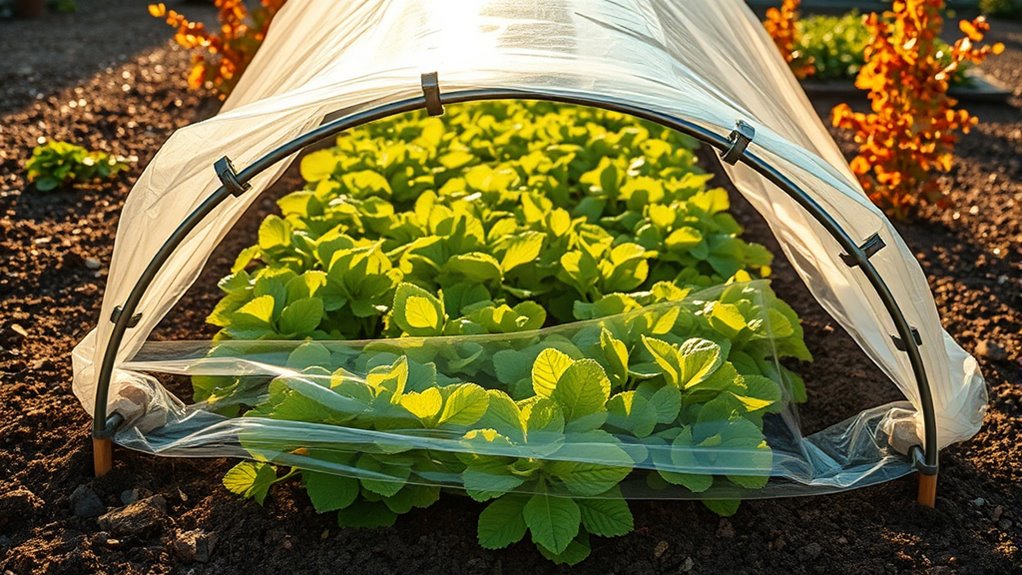
Securing the Covering Material

Once you’ve built your frame, the next step is to fasten the covering material to keep your greens protected. There are various covering material options, such as plastic sheeting, row covers, or frost cloths, each offering different benefits. To secure them effectively, use securing methods like stakes, clips, or weights. For lightweight covers, pinning edges with stones or bricks works well, while heavier plastic sheets may require grommets and bungee cords to hold them in place. Make sure the covering is taut but not stretched tight, to prevent tearing or wind damage. Proper securing ensures your low-tunnel stays intact, providing consistent protection against cold and wind throughout autumn. Incorporating secure fastening techniques can also help prevent damage caused by wind or animals. Additionally, ensuring that your storage and organization methods are efficient can make the process of securing coverings easier and more effective. Taking the time to secure the covering properly will extend the life of your greens and improve your harvest.
Anchoring the Structure for Stability
You need a solid foundation to keep your tunnel stable, so start by setting up a secure base. Proper stake placement is key—you want stakes driven deep into the ground at strategic points. This guarantees your structure stays upright and withstands wind or uneven ground.
Secure Foundation Setup
Before assembling your low-tunnel, it’s essential to establish a secure foundation to guarantee stability throughout the season. Proper soil preparation ensures your greens grow healthy and provides a stable base for the structure. You should:
- Clear debris and weeds from the planting area.
- Loosen the soil to improve drainage and root growth.
- Mix in compost or organic matter for nutrients.
- Apply pest control measures to protect your greens from pests.
This setup stabilizes the frame and prevents shifting. A solid foundation also helps resist wind and weather. Taking these steps guarantees your low-tunnel remains secure, your plants stay healthy, and pest problems are minimized throughout the season.
Proper Stake Placement
Proper stake placement is essential for anchoring your low-tunnel securely in the ground. To guarantee stability, select stakes with appropriate stake height—long enough to penetrate the soil deeply while leaving enough above ground to attach the covering. Space your supports evenly, maintaining consistent support spacing along the length of the tunnel. This prevents sagging and keeps the covering taut, protecting your greens from wind and pests. Drive stakes into the soil at a slight angle for added stability, especially in softer or uneven ground. Be careful not to bend or loosen stakes when securing the plastic or fabric cover. Proper stake placement creates a sturdy framework that withstands weather and maintains your tunnel’s shape throughout the season.
Managing Ventilation and Access
How can you guarantee your low-tunnel provides adequate ventilation while maintaining easy access? The key lies in effective ventilation strategies and thoughtfully planned access points. First, install adjustable side flaps or vents at strategic locations to control airflow. Second, create multiple access points, such as roll-up sides or front flaps, so you can open them easily without disturbing the plants. Third, position vents near the top of the tunnel to release excess heat and humidity. Fourth, keep access points simple—use lightweight materials or zippers for quick entry and exit. These measures ensure good air circulation, preventing overheating and disease, while allowing you to tend your greens efficiently. Proper management of ventilation strategies and access points keeps your low-tunnel functional and productive.
Tips for Maintaining Your Low-Tunnel Throughout Autumn
Maintaining your low-tunnel throughout autumn requires ongoing attention to its condition and environment. Regularly check the structure for tears or damage, repairing any issues promptly. Proper soil preparation is vital; make certain your soil remains healthy by adding compost and avoiding compaction, which promotes strong plant growth. Keep the soil moist but not waterlogged to prevent disease. Pest control is essential—inspect your greens frequently for insects or signs of infestation, and remove pests manually or use organic deterrents. Clear away fallen leaves and debris around the tunnel to reduce pest habitats and disease risks. Ventilate the tunnel as needed to prevent excess humidity, which can encourage mold. Consistent monitoring and maintenance will protect your greens and make certain of a productive autumn harvest.
Frequently Asked Questions
How Long Does a DIY Low-Tunnel Typically Last Before Needing Repairs?
A DIY low-tunnel typically lasts about 1 to 3 seasons before you need to think about cover material maintenance or repairs. Seasonal durability depends on the materials you choose and how well you care for it. If you use sturdy poly or fabric, it might last longer, but harsh weather can cause wear. Regular inspections and timely repairs will extend its lifespan, ensuring your greens stay protected throughout the season.
Can I Reuse the Materials From My Previous Low-Tunnel Setup?
You can often reuse materials from your previous low tunnel setup, but it depends on their condition. Reusing materials saves money and reduces waste, but you’ll need to check for wear and damage to make sure low tunnel maintenance remains manageable. Inspect your plastic sheeting, hoops, and stakes before reusing them. If they’re still sturdy and intact, reusing is a great option; otherwise, consider replacements to keep your tunnel effective.
What Are Common Pests That Can Invade Low-Tunnels During Autumn?
When it comes to autumn, pests can be a real headache, so it’s wise to stay one step ahead. Seasonal pests like aphids, beetles, and slugs often invade low-tunnels, seeking shelter and a warm meal. To prevent this, practice pest prevention by inspecting plants regularly, removing debris, and using physical barriers. This proactive approach helps keep your greens safe and thriving, even when pests are lurking around.
How Does Weather Variability Affect the Durability of the Cover Material?
Weather impact considerably influences the durability of your cover material. Variability in temperature, wind, and precipitation can cause wear and tear, making the cover more prone to tears or degradation over time. Strong winds might loosen or rip the cover, while rain and snow can weaken materials if they’re not weather-resistant. To guarantee longevity, choose high-quality, weatherproof cover material and regularly inspect it for damage caused by changing weather conditions.
Are There Specific Greens That Thrive Best Under Low-Tunnel Conditions?
While some greens may seem to flourish under low-tunnel conditions, it’s wise to take into account cover crop selection suited for such environments. You should also focus on soil preparation techniques that enhance growth and protect plants from cold. Leafy greens like spinach, lettuce, and kale often thrive best in these protected settings, offering you a reliable harvest. Tailoring your choices ensures your tunnel’s success and promotes healthy, resilient greens.
Conclusion
With your low-tunnel standing like a gentle guardian over your autumn greens, you’ve created a cozy haven where tender plants can thrive. As cool breezes whisper past, your careful craftsmanship keeps warmth and life thriving beneath the cover. This simple structure becomes a shield against nature’s unpredictability, transforming your garden into a vibrant, protected sanctuary. With each passing day, watch your greens flourish, basking in the quiet strength of your homemade autumn fortress.