
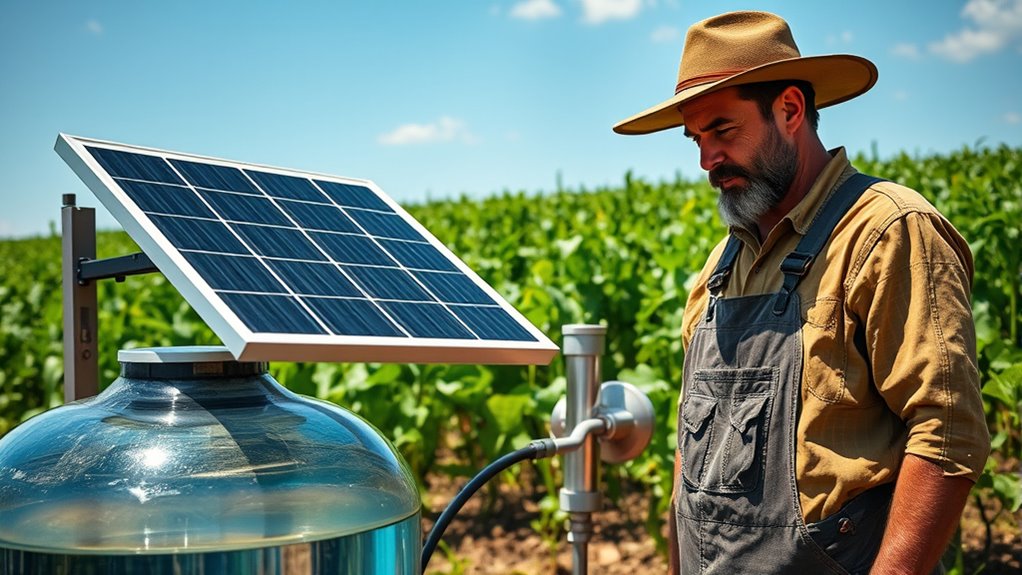
Building a solar-powered water pump for your farm is a smart, sustainable choice. You'll considerably cut costs compared to diesel pumps—potentially saving up to $7,500 each year. Start by gathering necessary parts like solar panels and a DC pump, then design a sturdy stand. After setting up your electrical connections and charge controller, maintain it regularly for peak performance. Keep exploring to guarantee you cover all essential steps for a successful installation.
Key Takeaways
- Select essential components like solar panels, a DC pump, and a charge controller to create an efficient solar water pumping system.
- Design a stable solar panel stand using I-beams, ensuring proper angle and alignment for maximum sunlight exposure.
- Install PVC pipes for water transport, ensuring proper sealing and minimizing leaks in your system.
- Regularly test and maintain the system, checking electrical connections and cleaning filters to ensure optimal performance.
- Monitor pump operation and water output to enhance water management and address any emerging issues promptly.
Understanding Solar Water Pumps
When you think about solar water pumps, imagine a sustainable solution that harnesses the sun's energy to move water efficiently. These systems are perfect for remote areas where traditional water supply options are limited.
They can pump water from wells or lakes directly to storage tanks. While smaller models might deliver under one gallon per minute, a well-designed system can provide over 350 gallons per day during peak sunlight hours.
To guarantee ideal performance, you'll need to take into account the pump's specifications, including head pressure and flow rate. Proper installation is vital—position the solar modules facing south and tilt them according to your local latitude.
A pump controller can enhance efficiency by managing operations based on solar output, preventing stalling during low sunlight.
Benefits of Solar Water Pumping Systems
Solar water pumping systems offer a range of benefits that can transform agricultural practices and improve efficiency. By harnessing renewable energy, you'll greatly reduce reliance on fossil fuels and lower operational costs—saving you up to $7,500 annually compared to traditional diesel pumps.
These systems can operate for about 2,600 hours each year, ensuring a dependable water source for your irrigation system and livestock without ongoing fuel expenses. With their automatic operation, solar pumps minimize labor and maintenance time, making your life easier.
Essential Parts and Tools Required
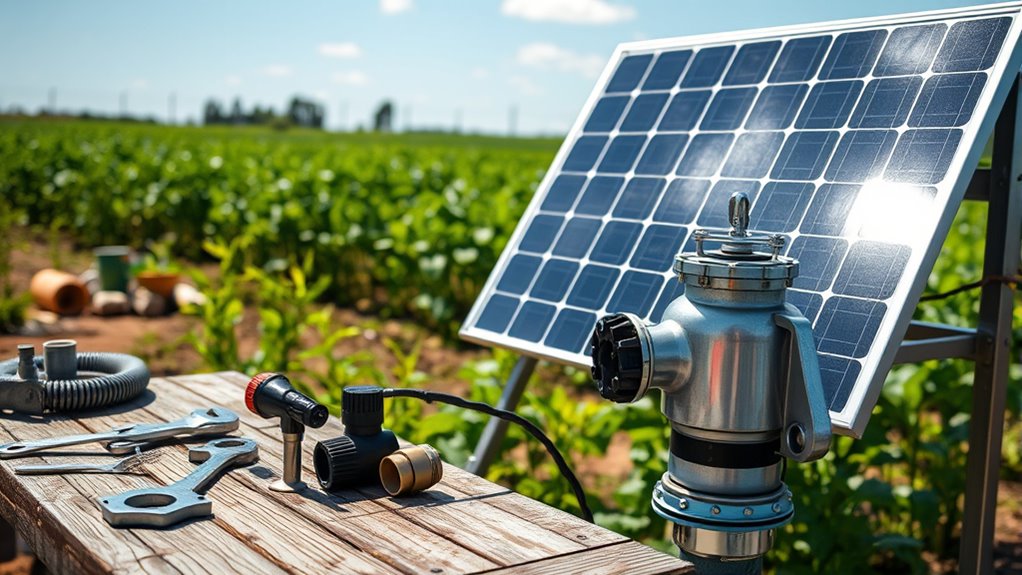
To build your solar-powered water pump, you'll need some key components and tools.
Start with a compatible pump, a solar panel, and a charge controller, along with PVC pipes for water transport.
You'll also want essential tools like a drill and wire cutters to guarantee everything fits together smoothly.
Necessary Components Overview
Building a solar-powered water pump requires essential components that work together to secure efficient operation.
To successfully set up your system, you'll need:
- Solar panels with a minimum output of 75 watts for energy generation.
- A compatible DC pump to guarantee proper water flow.
- A charge controller to manage energy between the panels and the battery.
Additionally, a float switch is vital for automating the pump based on water levels, preventing dry running.
You'll also need PVC pipes for transporting water, typically 1/2-inch for shorter distances.
Tools for Assembly
Gathering the right tools is just as important as collecting the components for your solar-powered water pump.
You'll need a reliable low-voltage DC pump, a compatible solar panel, and a battery for energy storage.
For assembly, be sure to have a drill with various bits, screwdrivers for tightening connections, and pliers for handling wires.
Wire cutters and strippers will help you prepare electrical connections effectively.
Don't forget PVC pipes and fittings for your water system, along with valves and sealants to prevent leaks.
A multimeter is essential for measuring voltage and current during setup, ensuring everything runs smoothly.
With the right tools, your assembly process will be efficient and successful.
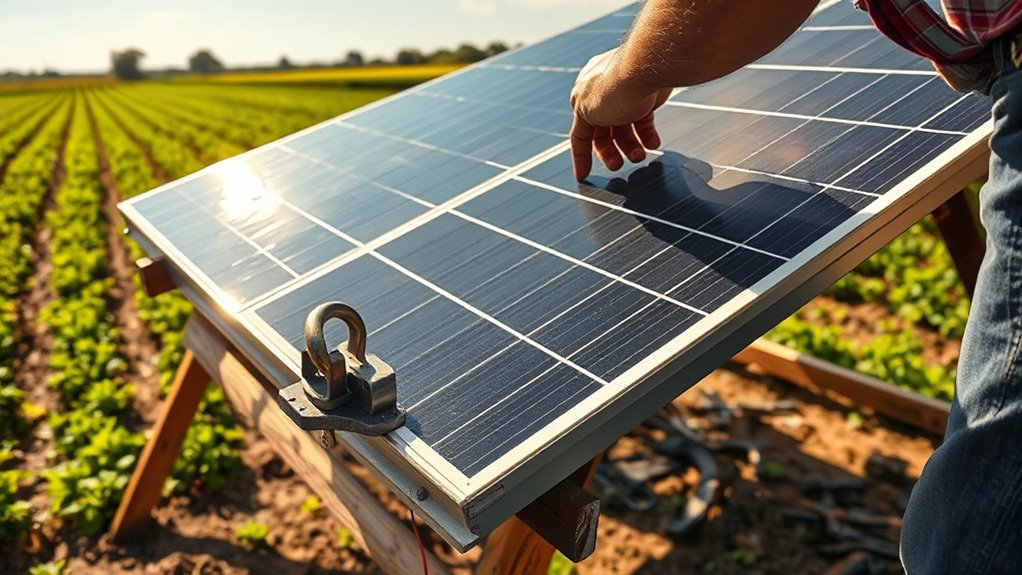
Designing the Solar Panel Stand
When designing your solar panel stand, start with a solid foundation using I-beams for stability.
You'll want to angle your panels to match your local latitude for maximum sunlight exposure.
This setup not only secures the panels but also enhances their efficiency throughout the year.
I-Beam Foundation Setup
To create a stable I-beam foundation for your solar panel stand, you'll need to start by digging a 2ft x 2ft x 2ft hole for each I-beam.
Make sure the vertical placement is perpendicular using a level. After positioning the I-beam, fill the hole with cement to guarantee maximum stability against wind and other environmental factors.
Maintain a separation of 24.46 feet between the two I-beams for proper support and structural integrity.
- Confirm that the lower C-channel is parallel to the ground with a level.
- Use stainless steel nuts and bolts to securely fasten the C-channel to the I-beams.
- Check all connections regularly to prevent structural failure over time.
This setup will support your solar-powered water pump effectively.
Solar Panel Alignment Techniques
With a solid I-beam foundation in place, it's time to focus on how to align your solar panels for ideal performance.
Begin by ensuring your panels face south, maximizing sunlight exposure and energy production. The tilt angle should match your installation site's latitude for enhanced efficiency across seasons.
To find the best angle, use calculators that account for monthly sun height variations, which can improve overall system performance.
Remember, regular adjustments to your solar panel alignment may be necessary to adapt to seasonal changes in the sun's position. This will help maintain maximum solar energy capture, ensuring your water pump operates efficiently throughout the year.
A well-aligned system is key to harnessing the full potential of solar power.
Installing the I-Beam Foundation
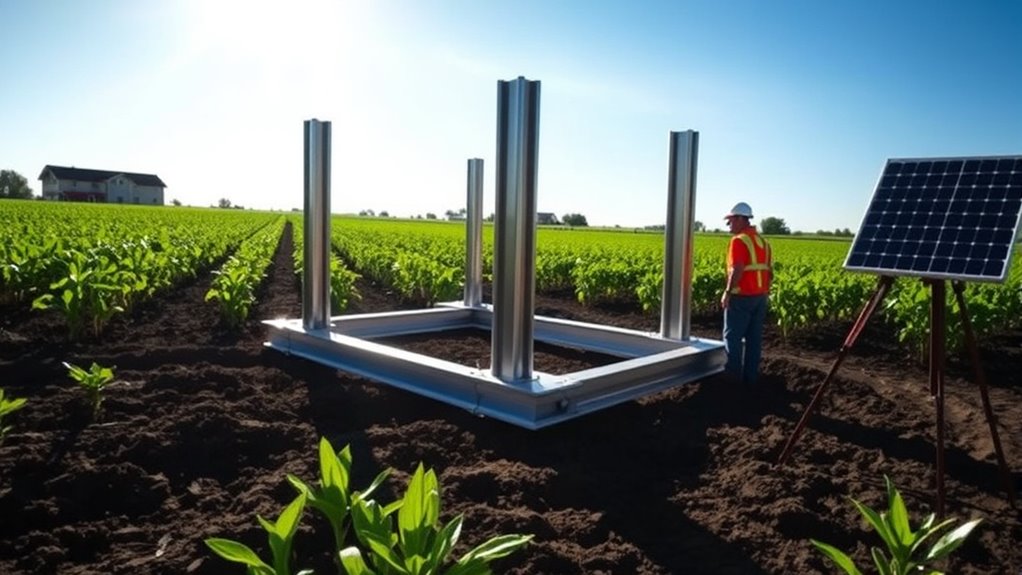
Installing the I-beam foundation is vital for a stable and durable solar panel support structure.
To guarantee your solar water pump operates efficiently, follow these steps:
- Dig a 2ft x 2ft x 2ft hole for each I-beam.
- Position the I-beam vertically and use a Level Bottle to check alignment.
- Fill the hole with cement for stability, allowing a depth of 2ft.
Repeat this process for a second I-beam, keeping a separation of 24.46ft between the two.
This spacing is essential for ideal support of the solar panel array. Make sure both I-beams are aligned and stable before moving on to the next steps in your solar-powered water pump installation.
A solid foundation is key to the longevity of your structure.
Attaching C-Channels for Stability
Once you've established the I-beam foundation, it's crucial to attach the C-channels for added stability. Measure and cut the C-channel to a length of 24.46 feet, then position it parallel to the ground.
Use a Level Bottle to guarantee proper alignment before you fasten it securely. Utilize stainless steel nuts and bolts to attach each end of the C-channel to the I-beams, enhancing the structural integrity of your solar panel system.
After attachment, check for any movement or misalignment, as this could affect your solar array's overall performance. Also, position the C-channel at a height that facilitates drainage to prevent water pooling around the support structure.
Regularly inspect these connections for wear or corrosion to maintain long-term stability.
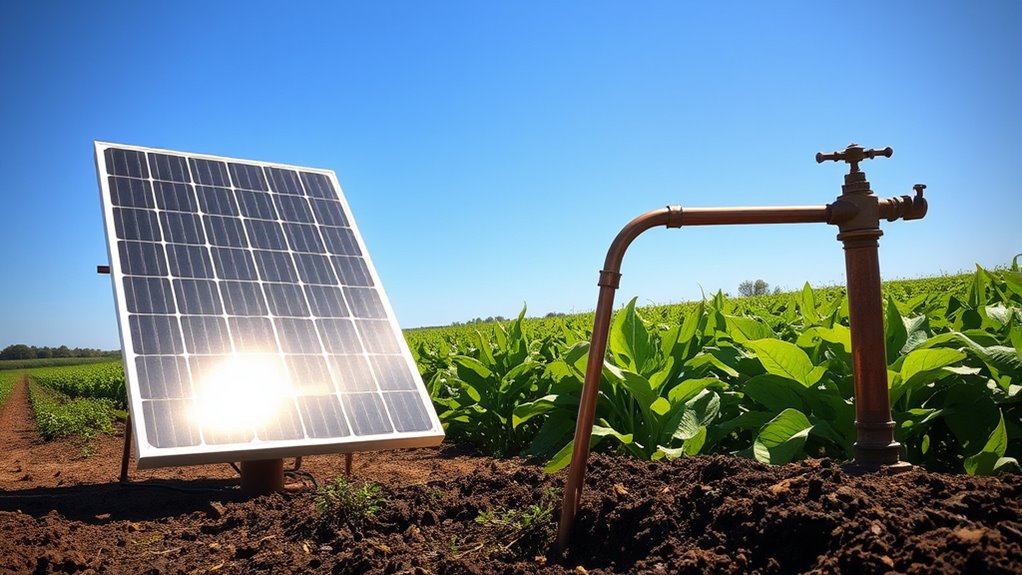
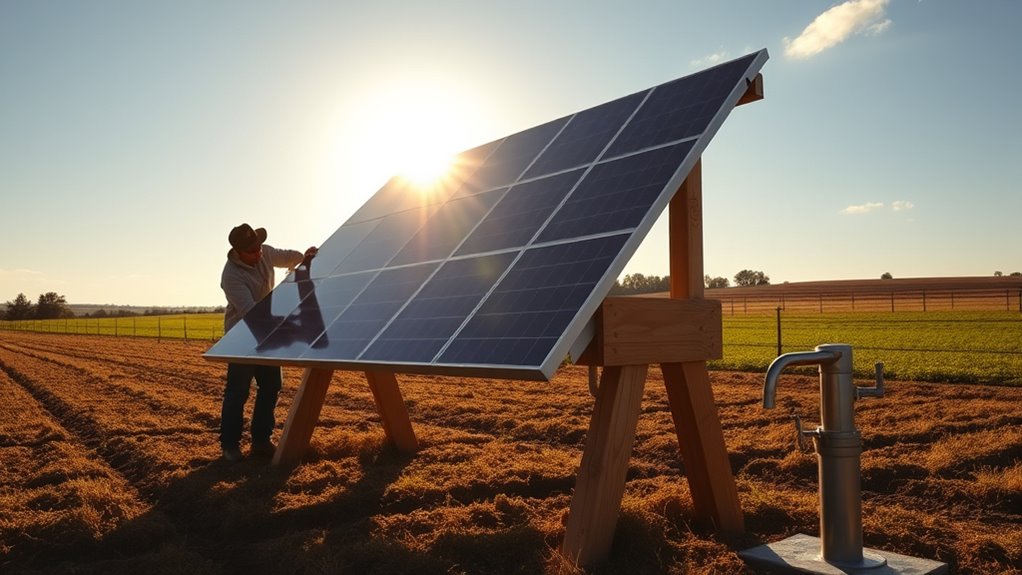
Mounting the Solar Panels

To guarantee your solar panels capture the maximum amount of sunlight, it's crucial to mount them facing south in North America. Positioning your panels correctly increases energy production throughout the day.
Mount your solar panels facing south for optimal sunlight capture and increased energy production throughout the day.
Make sure you choose the best tilt angle that matches your local latitude for enhanced efficiency across seasons.
- Use a raised pole or sturdy framework to mount the solar panels.
- Verify the structure is stable and securely fastened to withstand wind and weather conditions.
- Perform regular inspection of the mounting system for any signs of wear or damage. Additionally, consider how color accuracy can enhance the effectiveness of solar panel materials and their longevity.
Electrical Connections and Controller Setup
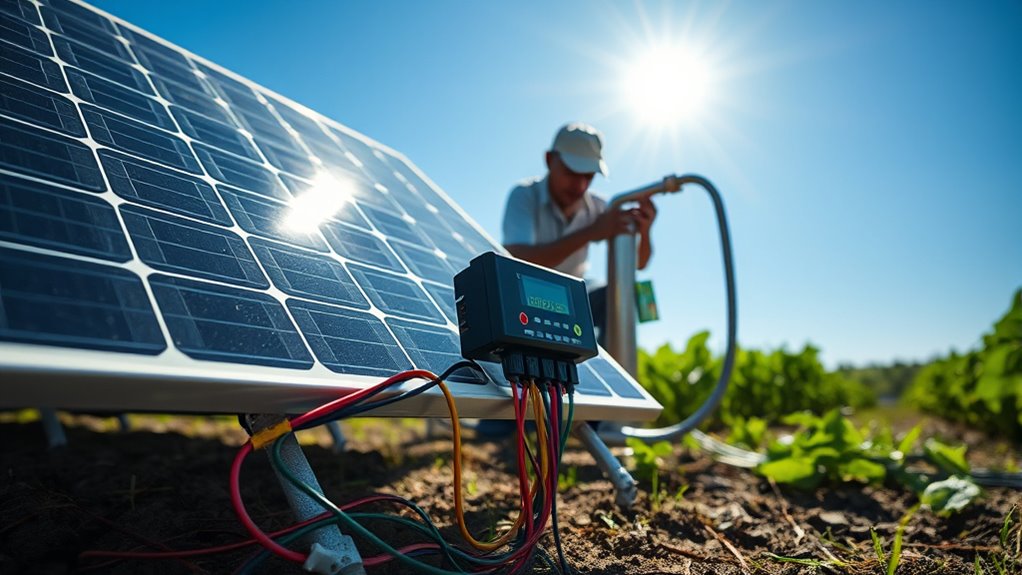
As you connect the solar panels to the pump controller, it's important to use appropriately gauged wiring to guarantee efficient power transfer. Typically, you'll want to use 10 or 12 AWG wire for longer runs. The pump controller manages the voltage output from your solar power system, preventing pump stalling during low sunlight by automatically regulating pump operation. Incorporating a float switch automates the pump based on water levels, enhancing water management. Make sure all electrical connections are weatherproofed to prevent corrosion, which can impact system performance. Regularly check voltage output and connection integrity with a multimeter for peak efficiency.
| Component | Purpose |
|---|---|
| Pump Controller | Manages voltage output |
| Float Switch | Automates pump operation |
| Weatherproofing | Protects connections from damage |
Testing and Maintaining Your System
After confirming your electrical connections are secure and weatherproofed, it's time to focus on testing and maintaining your solar-powered water pump system.
Regular testing is essential for peak performance. Aim for over 350 gallons of water daily during peak sunlight hours. Here are key maintenance tasks:
- Inspect electrical connections monthly for wear or damage.
- Check solar panel output with a multimeter to verify it exceeds 120 volts.
- Clean the pump and filters regularly to prevent blockages.
Additionally, maintain a log of operational data, noting pump cycles and any maintenance performed.
This helps you monitor performance trends and spot emerging issues early, guaranteeing your system runs smoothly and efficiently year-round.
Frequently Asked Questions
How Many Solar Panels Does It Take to Run a Water Pump?
The number of solar panels you need to run a water pump depends on the pump's power requirements. For smaller pumps, one 75-watt panel might suffice.
However, for larger submersible pumps, you could need at least 1,000 watts in total, which translates to four 250-watt panels.
Which Solar Pump Is Best for Agriculture?
When it comes to choosing the best solar pump for agriculture, you'll want a system that's both reliable and robust.
The Grunfos SQ Flex series stands out with its superb flow rates and head capabilities, perfect for diverse farm demands.
If you're working on a smaller scale, the SHYLIYU submersible pump offers efficiency at depths of up to 60 feet.
Consider your specific needs, and you'll find the ideal pump for your agricultural endeavors.
What Are the Disadvantages of a Solar Water Pump?
When considering a solar water pump, you'll find several disadvantages.
First, it relies on sunlight, so cloudy days can hinder performance. The initial investment can be high, which might strain your budget.
Efficiency drops with increased lifting needs, making it unsuitable for high-demand applications. Plus, maintenance is essential over time, adding to your costs.
Finally, output is often lower than conventional pumps, potentially leaving you short on water supply for larger operations.
Can You Run a Water Pump on Solar Power?
Yes, you can definitely run a water pump on solar power.
In fact, it's a reliable way to harness renewable energy. Solar-powered water pumps use direct sunlight to operate, often without the need for batteries.
If you set up your solar panels facing south and choose the right pump, you can efficiently pump over 350 gallons a day during peak sun hours.
Just remember to take into account proper installation for ideal performance!
Conclusion
By harnessing the sun's energy, you're not just powering a water pump; you're cultivating a brighter future for your farm. Just as a seed grows with care and sunlight, your investment in a solar water pumping system nurtures both your crops and your commitment to sustainability. Embrace this transformation, and let your farm flourish under the warm embrace of renewable energy. With every drop of water, you're watering the roots of change.