
To build a low-cost walk-in cooler with an A/C unit, start by planning your space carefully, focusing on insulation and proper layout to maximize efficiency. Choose an energy-efficient A/C with the right capacity for your size, and install well-sealed insulated walls and floors. Position the system for ideal airflow and ventilation. Regularly test, seal, and maintain the cooler to keep it running smoothly. If you want detailed steps, there’s more to explore below.
Key Takeaways
- Optimize space layout and insulation materials to enhance efficiency and reduce construction costs.
- Select a cost-effective, energy-efficient A/C unit with appropriate capacity for the cooler size.
- Use high-quality, affordable insulation like foam board to seal walls and floor effectively.
- Position the A/C evaporator high on the wall and ensure proper ventilation for even cooling.
- Regularly test temperature, inspect seals, and perform maintenance to prolong lifespan and maintain efficiency.
Planning and Designing Your Cooler Space

Before you start building your cooler, it’s essential to carefully plan and design the space. First, consider your space layout to maximize efficiency and ease of access. Decide where the door, shelves, and cooling unit will go, ensuring enough room for storage and movement. Next, focus on selecting the right insulation materials; good insulation is key to maintaining consistent temperatures and reducing energy costs. Use materials like foam board or spray foam, which provide excellent thermal resistance and are easy to install. Proper planning helps you avoid costly revisions later. Take measurements accurately and sketch your layout to visualize how everything fits together. Additionally, choosing the right cooling unit and ensuring it matches your space’s insulation will optimize energy efficiency and cooling performance. A well-designed plan ensures your cooler functions smoothly and stays within budget, making the building process straightforward and effective. Additionally, understanding bicycle maintenance principles can help you implement proper ventilation and ensure the cooling system is accessible for repairs. Ensuring proper ventilation is crucial for maintaining consistent temperatures and preventing moisture buildup inside your cooler. Incorporating insulation materials with high thermal resistance further enhances temperature stability and energy savings.
Selecting the Right A/C Unit for Cooling Efficiency
Choosing the right A/C unit is essential for ensuring your walk-in cooler maintains consistent temperatures efficiently. Focus on energy efficiency to reduce long-term operating costs and save on electricity bills. Look for units with high SEER (Seasonal Energy Efficiency Ratio) ratings, which indicate better energy performance. Consider the size and capacity of the A/C to match your cooler’s volume; an undersized unit will struggle, while an oversized one may cycle unnecessarily, wasting energy. Balance initial cost with energy savings—sometimes a more efficient unit costs more upfront but pays off over time. Also, check for features like programmable thermostats and variable-speed fans that can enhance cooling efficiency and help you manage costs more effectively. Maximizing space and organization can also improve overall system performance by ensuring proper airflow and maintenance access. Additionally, selecting units with easy maintenance features can prevent unexpected downtime and extend the lifespan of your cooling system.
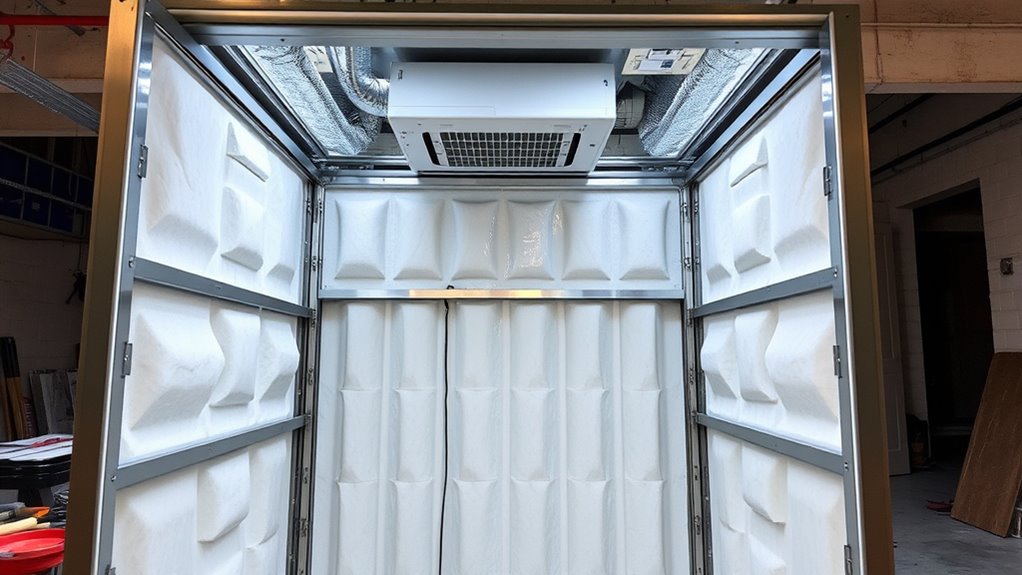
Building the Insulated Walls and Floor

Building the insulated walls and floor is a critical step in ensuring your walk-in cooler maintains a consistent temperature and operates efficiently. Proper insulation materials prevent heat transfer, saving energy and reducing costs. Focus on sealing gaps and cracks around the door to improve door sealing, which is essential for minimizing cold air leakage. When constructing the walls and floor, consider these key points:
- Use high-quality insulation materials like foam boards or spray foam for maximum efficiency.
- Seal all seams and edges thoroughly to prevent air leaks, which is essential for maintaining the desired temperature.
- Ensure the door frame is well-insulated and properly sealed to maintain temperature stability.
- Additionally, understanding the importance of insulation materials can help you select the most effective options for your project, ensuring optimal thermal performance. Choosing the right thermal insulation can significantly enhance energy savings and temperature control. Building strong communication with your team can also facilitate a smoother installation process and help address issues promptly. Incorporating proper ventilation practices can further improve the overall efficiency and longevity of your walk-in cooler.
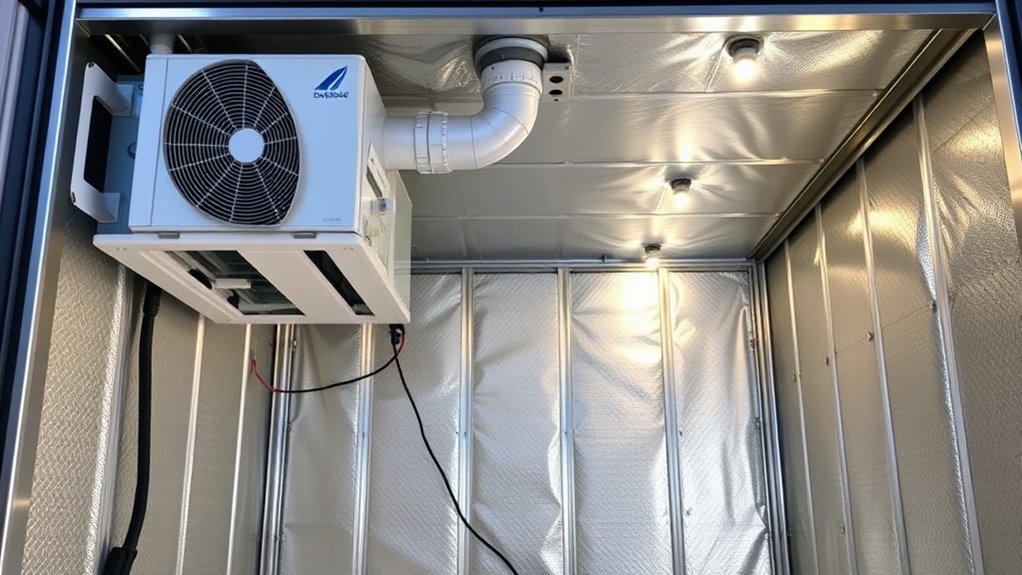
Installing the A/C System and Ventilation
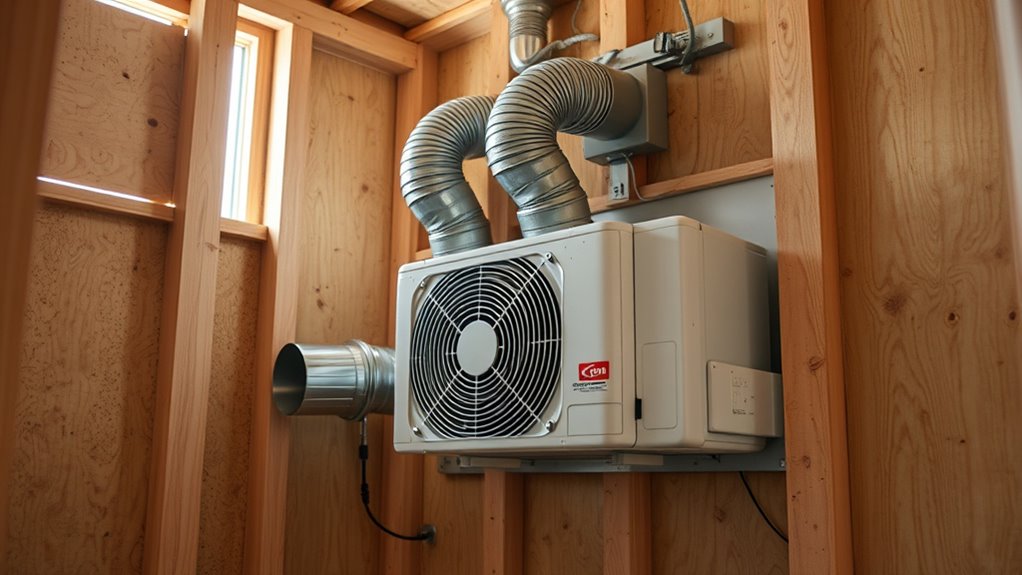
Installing the A/C system and ventilation is essential for maintaining a stable, cool environment inside your walk-in cooler. Proper evaporator placement ensures efficient cooling; position it high on a wall where cold air can circulate evenly across the space. Avoid blocking airflow with shelves or stored items. To maximize airflow, use ducting or fans to direct cool air throughout the interior, preventing hot spots. Make sure the ventilation vents are placed strategically to promote proper air exchange and remove excess humidity. Secure all connections tightly to prevent leaks and ensure the system operates efficiently. Proper installation of the A/C unit, combined with effective ventilation, guarantees consistent temperatures and energy efficiency, helping your cooler maintain optimal conditions with minimal cost. Incorporating system efficiency measures and regular maintenance can further enhance performance and longevity of your cooling setup. Additionally, consulting professional HVAC services can help optimize the system configuration for your specific space.
Testing, Sealing, and Maintaining Your Cooler
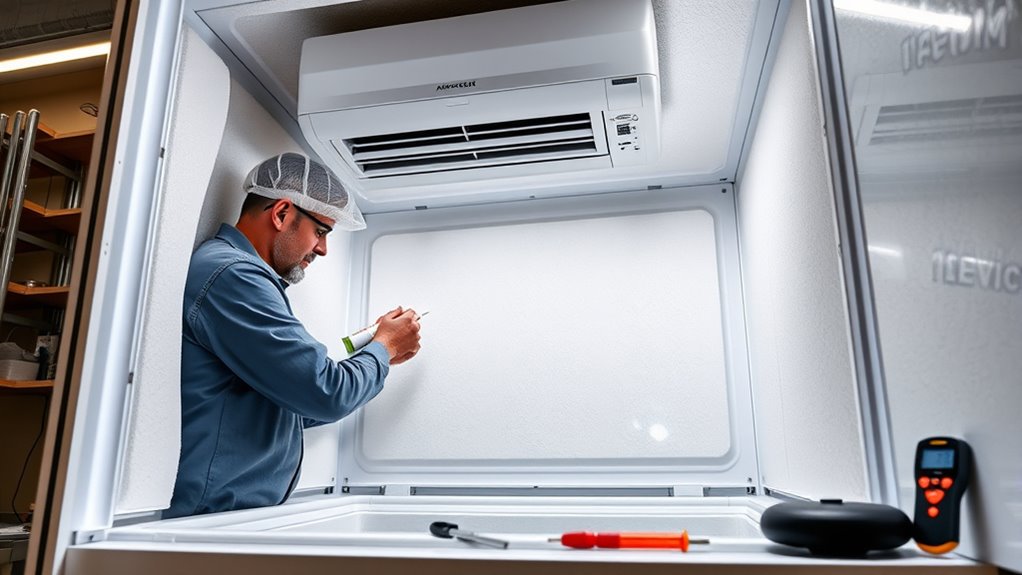
Once your A/C system and ventilation are set up, it’s important to thoroughly test the cooler to guarantee everything functions properly. Check for consistent temperature regulation by placing a thermometer inside and monitoring it over several hours. Ensure humidity control is effective by observing moisture levels and adjusting seals if needed. Proper sealing prevents air leaks that can compromise cooling efficiency. Maintain your cooler regularly by cleaning filters, inspecting insulation, and checking for mold or pests. Regularly inspecting for and addressing air leaks can significantly improve overall energy efficiency and cooling performance. Additionally, inspecting HEPA filters and replacing them as recommended helps maintain optimal air quality and cooling effectiveness. Verify that doors seal tightly and prevent air exchange. Monitoring filter indicators and replacing filters promptly ensures your system runs efficiently. Keep an eye on temperature and humidity levels regularly. Proper sealing and maintenance are essential for preventing energy loss and ensuring consistent cooling. Replacing or repairing worn seals and insulation promptly also helps to maintain the integrity of your cooler. Incorporating preventative maintenance routines can extend the lifespan of your cooling system and improve its efficiency.
Frequently Asked Questions
How Can I Ensure Proper Airflow Inside the Cooler?
To guarantee proper airflow inside your cooler, focus on strategic airflow vents and fan placement. You should position the vents to promote even circulation throughout the space, avoiding dead spots. Place the fan where it can distribute cool air effectively, ideally near the vents, to keep the temperature consistent. Regularly check and clean vents and fans to maintain ideal airflow, preventing uneven cooling and ensuring your cooler operates efficiently.
What Safety Precautions Should I Take During Installation?
When installing your cooler, you should prioritize safety by carefully handling electrical wiring, guaranteeing all connections are secure and comply with safety codes. Use proper insulation selection to prevent electrical hazards and improve efficiency. Turn off power before working on wiring, wear protective gear, and double-check all connections. Avoid shortcuts, and if unsure, consult a professional to ensure safe installation and reliable operation of your cooler.
How Do I Prevent Mold and Mildew Growth?
You might think mold prevention is impossible, but with the right steps, mildew control is achievable. To prevent mold and mildew growth, keep your cooler dry and well-ventilated. Regularly clean surfaces with a mixture of water and vinegar, and use a dehumidifier if needed. Ensuring proper insulation and controlling humidity levels are essential, so stay vigilant and act quickly at the first signs of moisture to keep your cooler mold-free.
Can I Upgrade the A/C Unit Later?
Yes, you can upgrade your A/C unit later. When you decide to do so, consider insulation upgrades to improve efficiency and reduce energy costs. You might also need a compressor replacement if your current system is outdated or underperforming. Upgrading ensures better cooling and energy savings, making your walk-in cooler more effective. Just plan for proper compatibility and professional installation to maximize your investment.
What Is the Estimated Lifespan of a DIY Cooler?
Imagine your cooler as a sturdy riverboat, weathering many seasons. With proper insulation materials and regular compressor maintenance, you can expect it to last around 5 to 10 years. Just like a well-cared-for vessel, keeping the components in check ensures smooth sailing. Over time, wear and tear may require upgrades or repairs, but diligent upkeep helps extend its useful life considerably.
Conclusion
Building a low-cost walk-in cooler is like crafting a sturdy, reliable toolbox—you want it to work smoothly and stand the test of time. With proper planning, the right A/C unit, solid insulation, and good maintenance, your cooler will keep everything fresh without breaking the bank. Think of it as planting a garden—you nurture it, and it rewards you with cool, fresh storage, just like a well-tended plant thriving in the sun.